Study Browser
The Study Browser is the main interface to quickly search and discover studies of interest.
Important
Without Access all data permission you can access only studies created by you or shared with a group you belong to. You can access all studies in the ODM with Access all data permission. Refer to the section User Setup to learn more about users and permissions.
Getting to the Study Browser
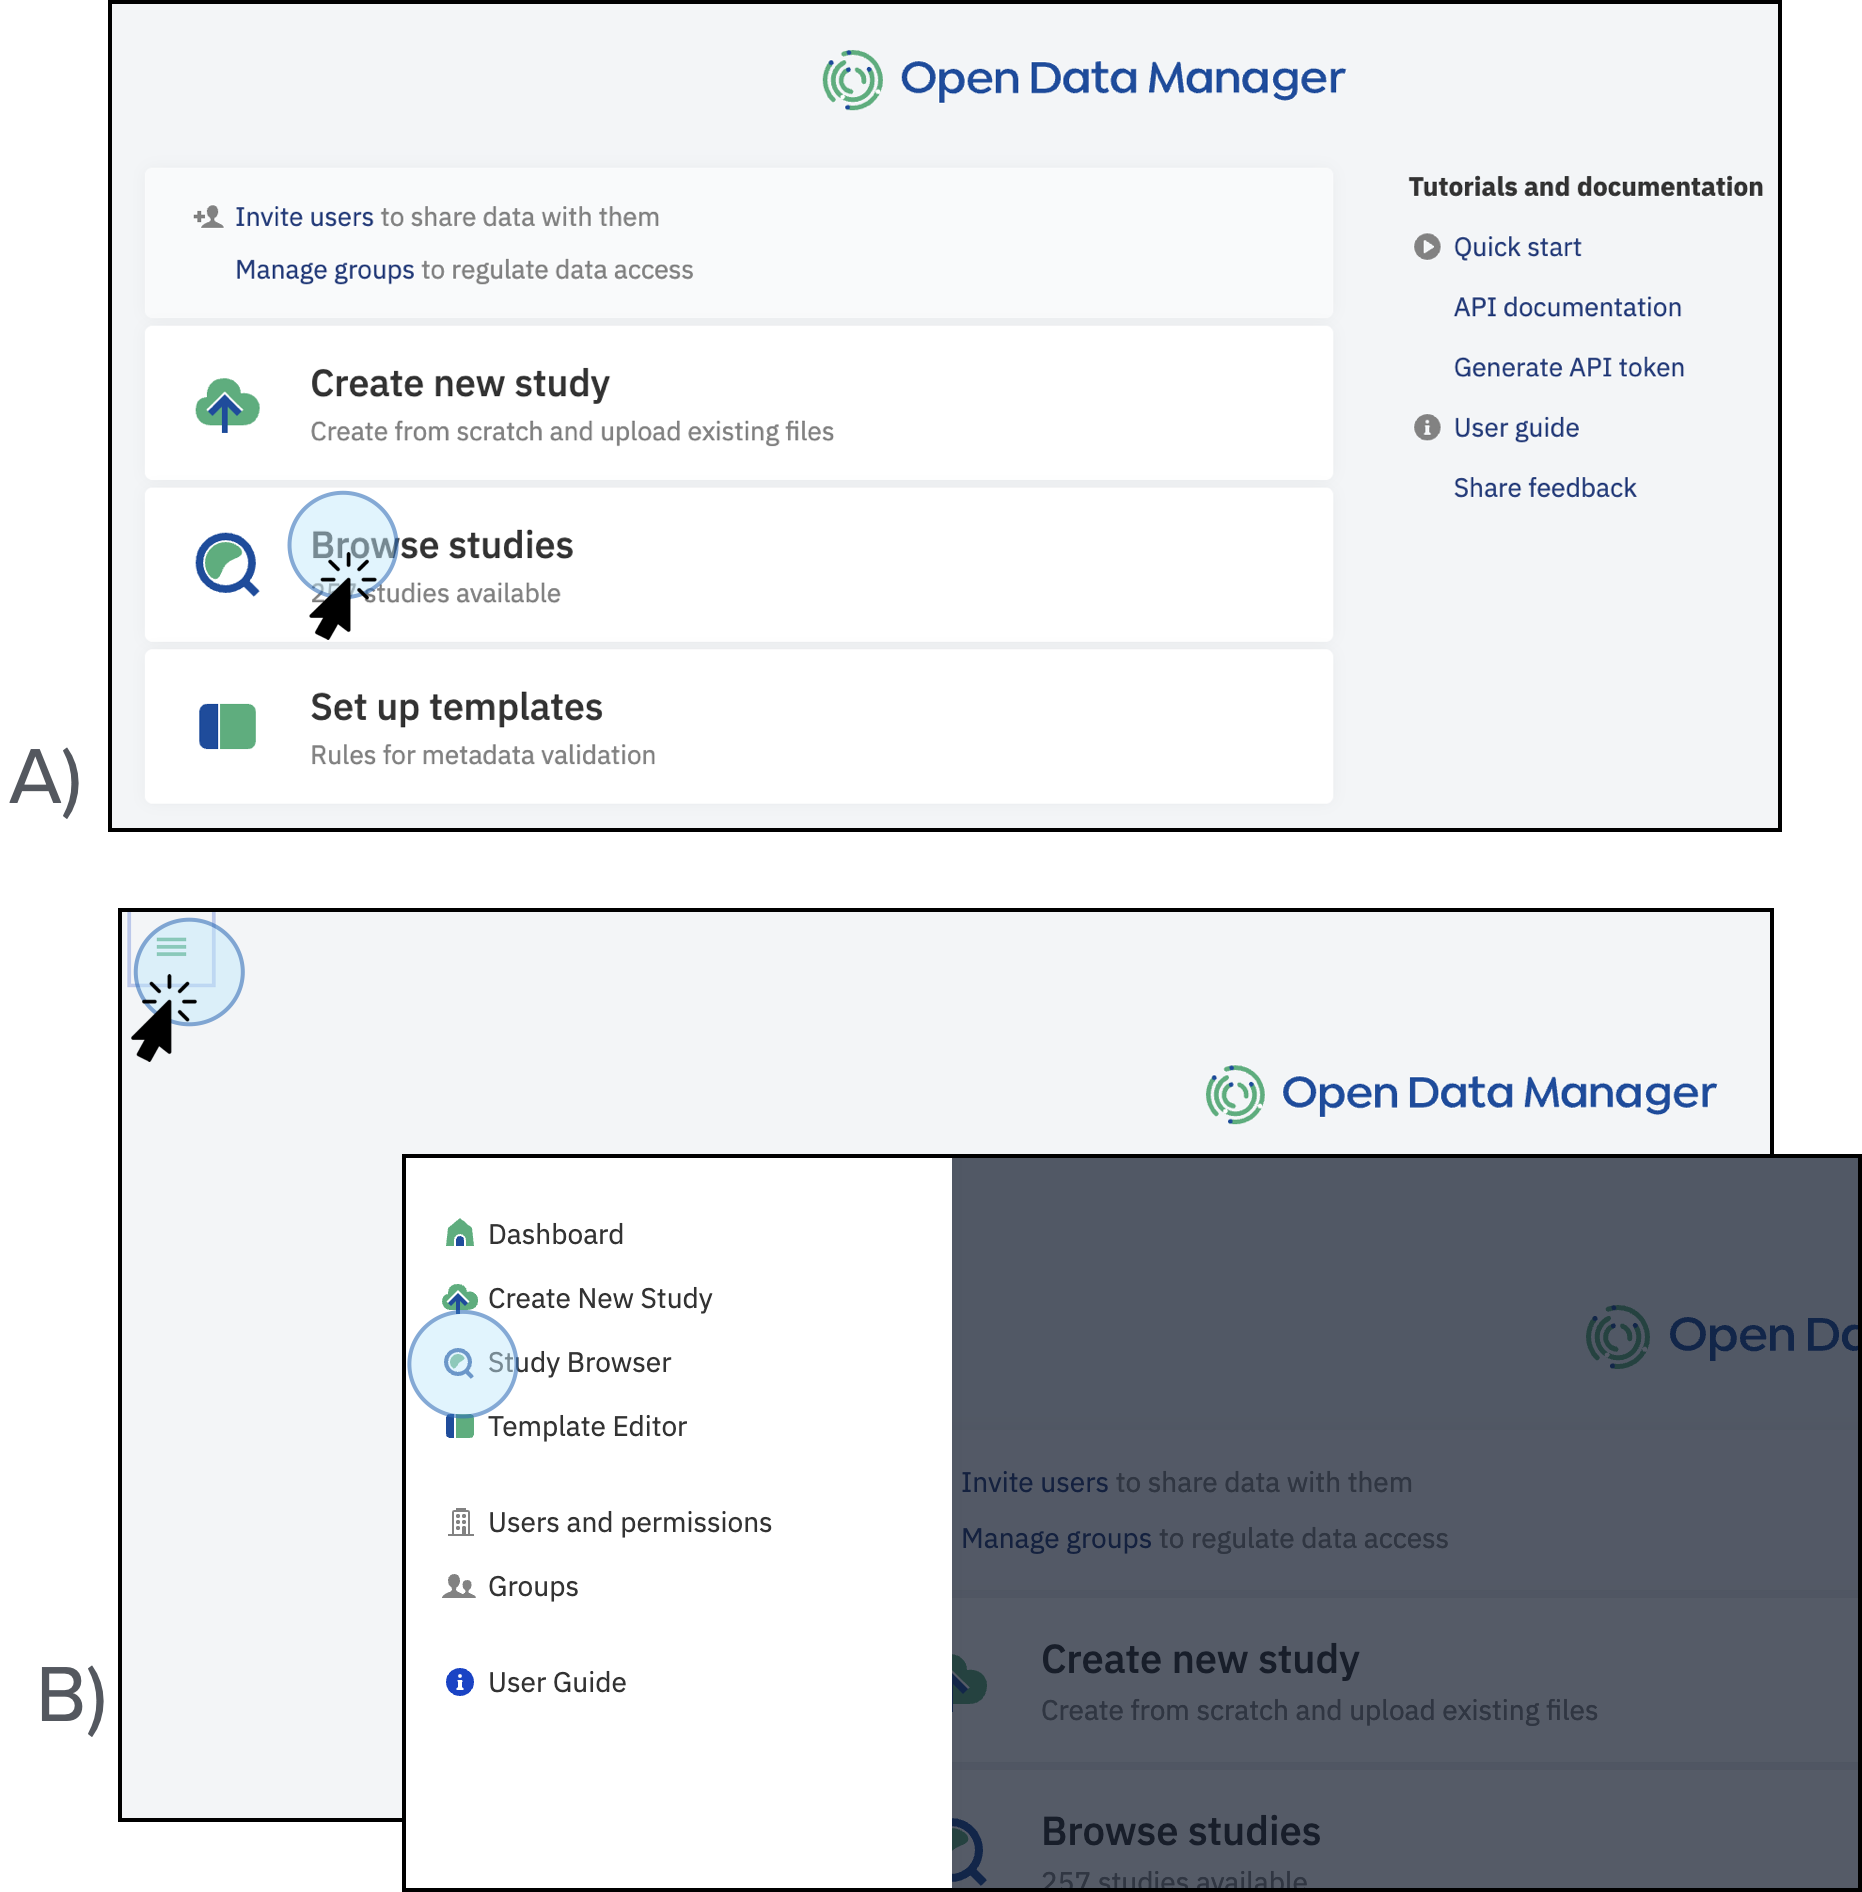
You can access the list of available studies by clicking on Browse Studies from the dashboard, or by clicking at the top left menu and selecting Study Browser.
- Under the study title there is a summary of the metadata that is associated with the study. This displays information such as the organism, tissue, cell-type, disease and so on and is pulled straight from the metadata fields of the samples in the study.
- You can hover over any name in the summary column and the name of the metadata field where the data comes from will appear.
- There is also information of who imported the study into ODM and when.
- To the right of the study title you can see how many samples are present in the study and which Data Classes are associated with it.
Search for Data
At the top of the window is the main search bar. You can search by the name of a study, the accession number, sample or signal object, or any text within any metadata field across all data visible to you.
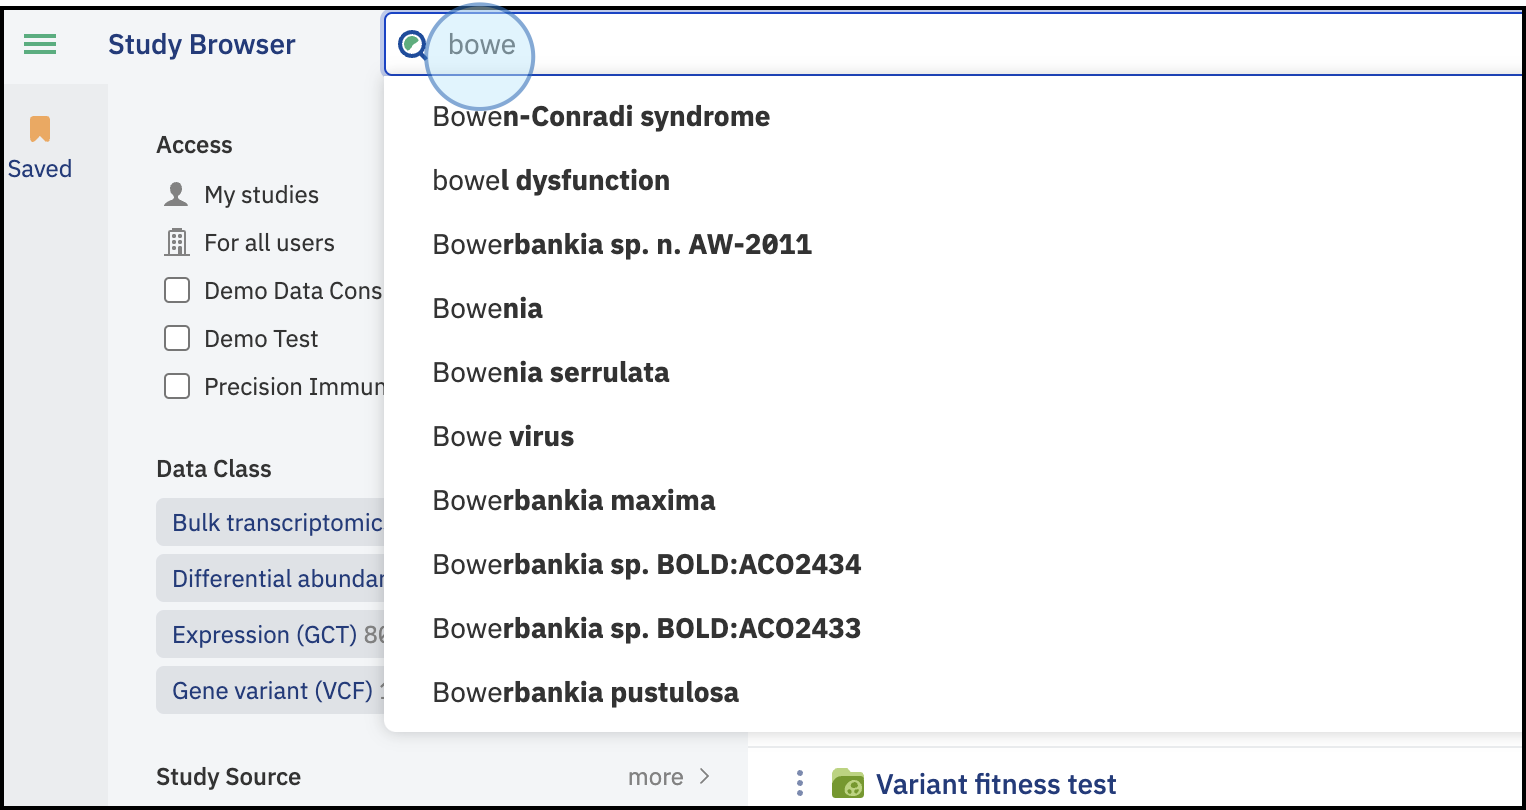
- As you type, autocomplete suggestions based on dictionaries of terms present in ODM will appear.
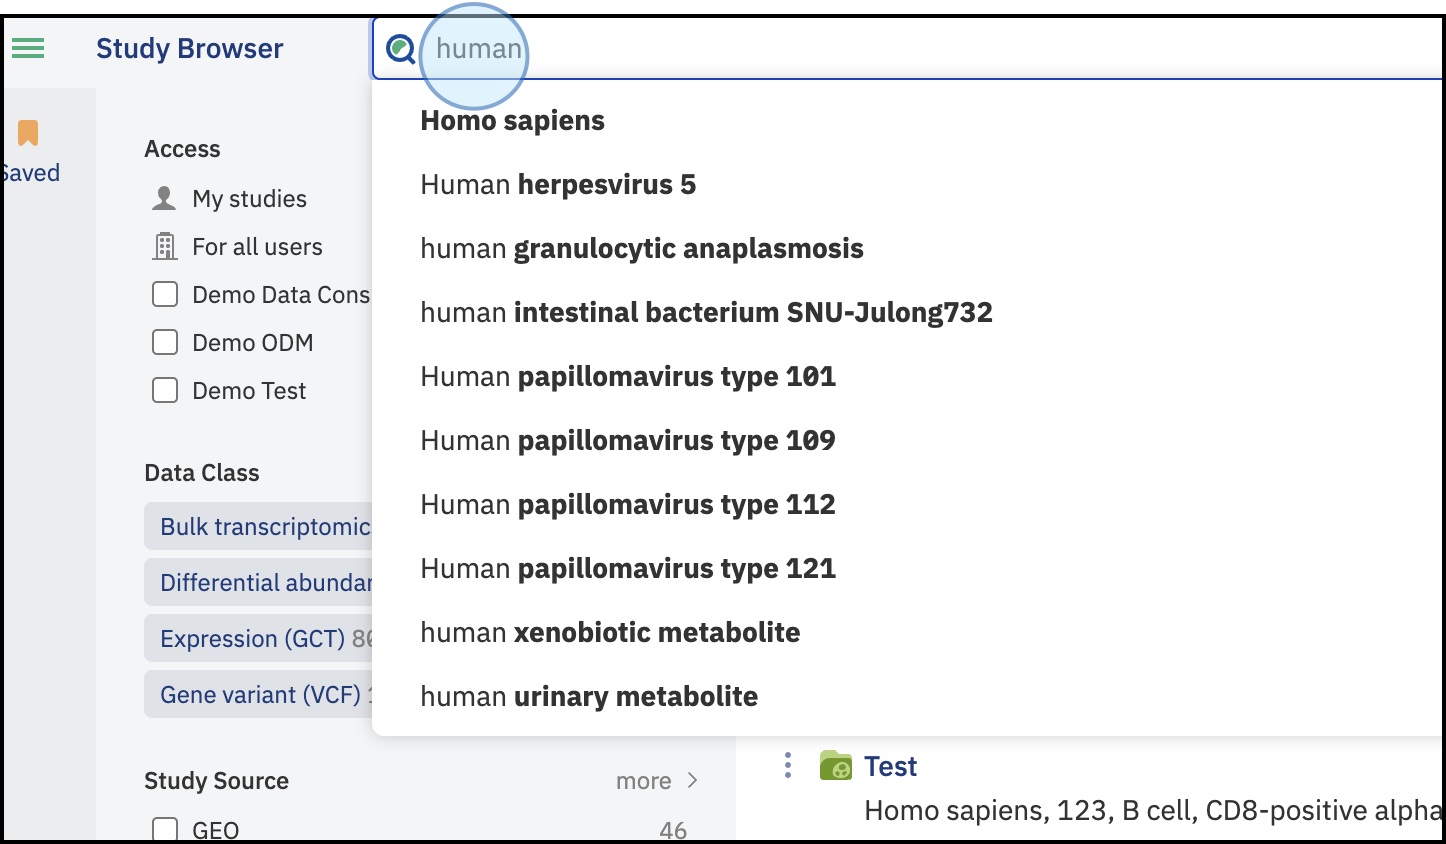
- The search is synonym-aware, meaning if you type in ‘human’, it will suggest Homo sapiens and include results for synonyms.
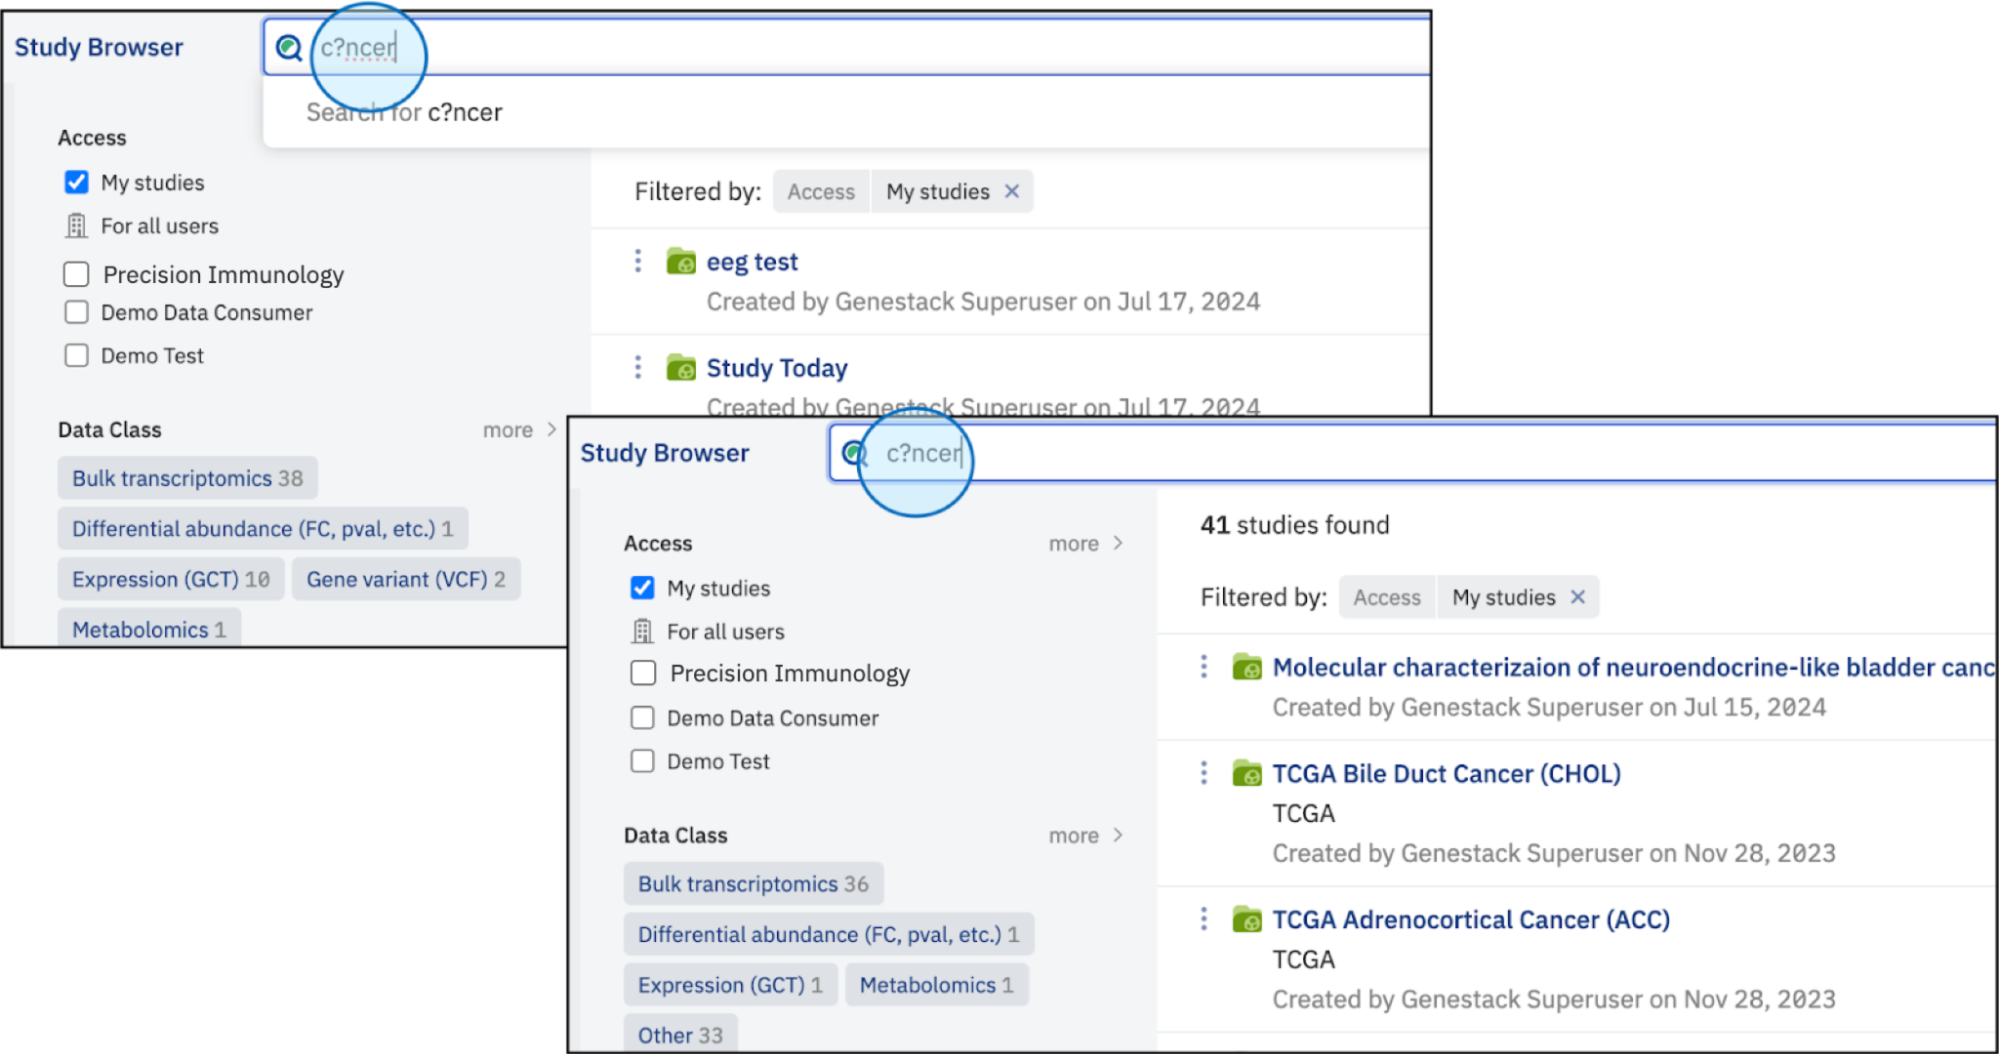
- Use question marks (?) to match any character.
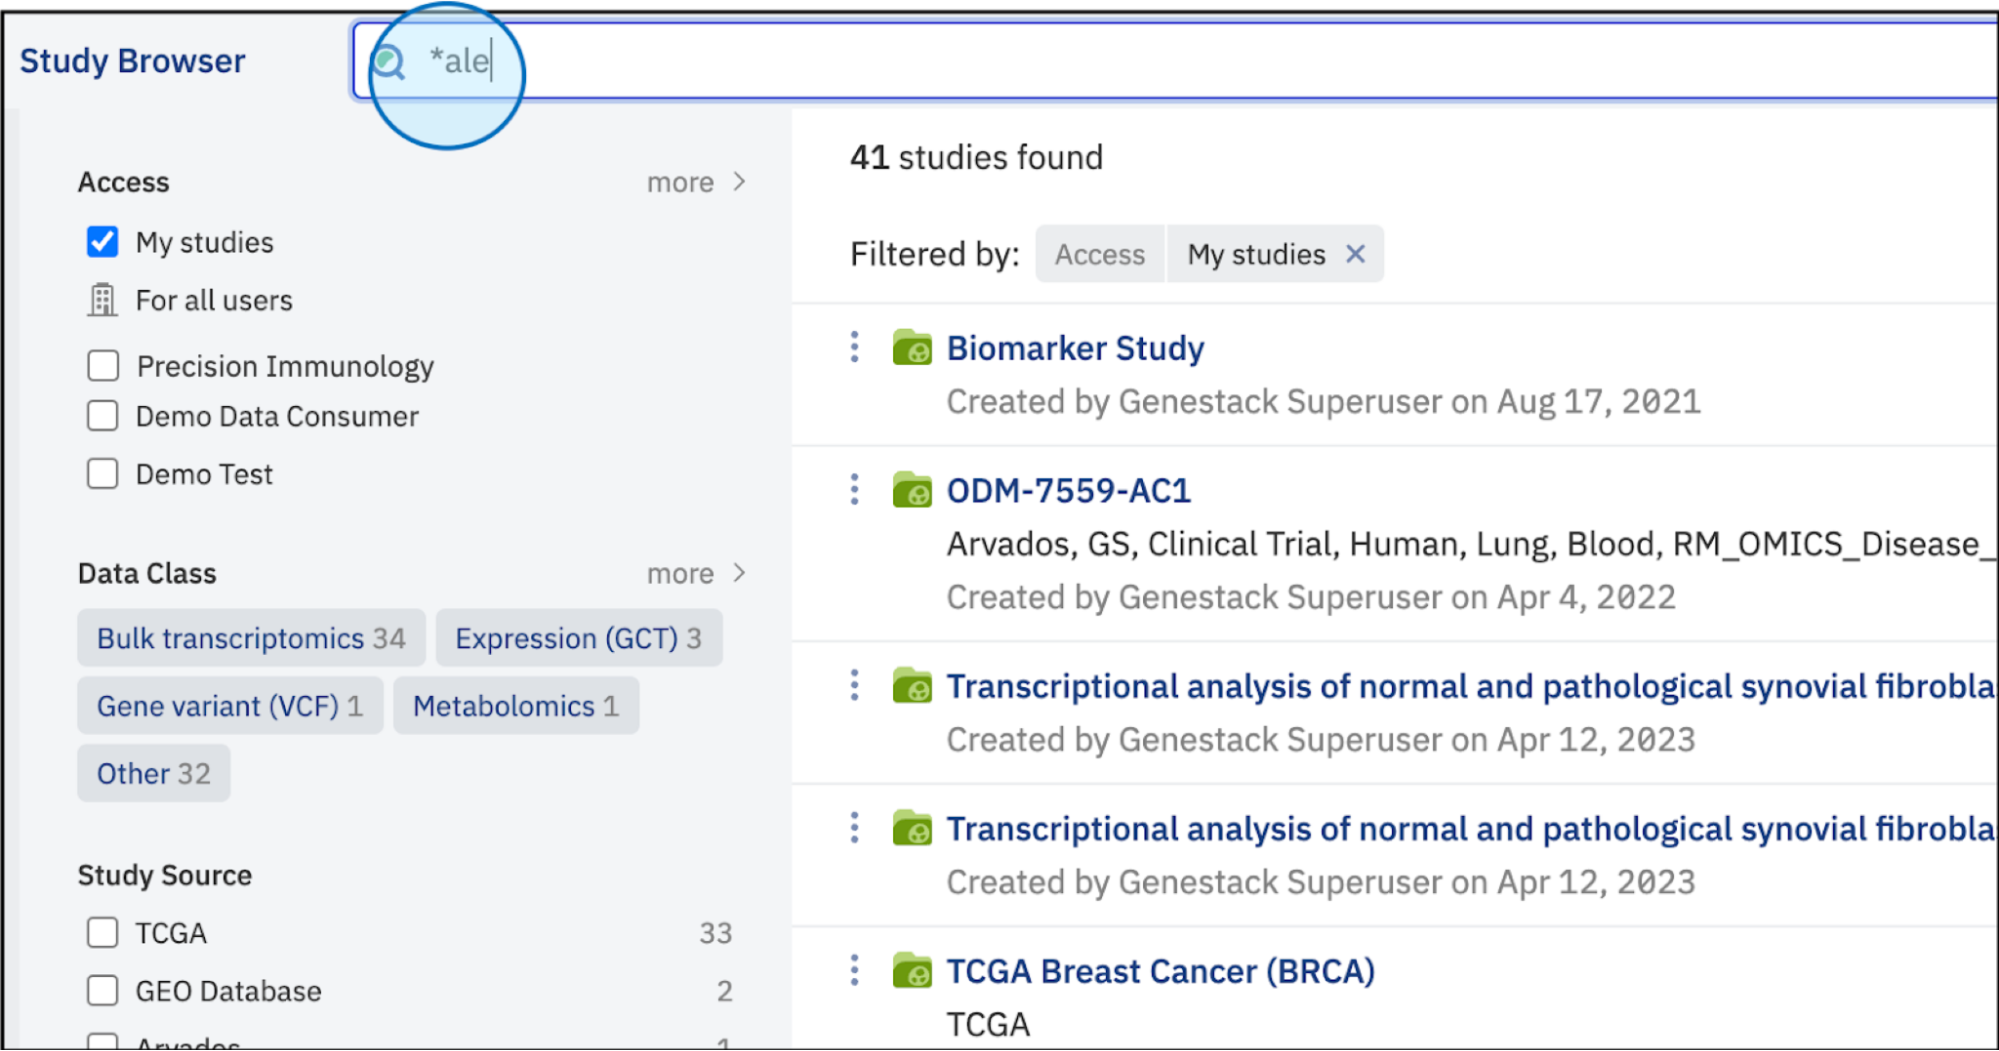
- Use asterisks (*) to allow any number of wildcard characters.
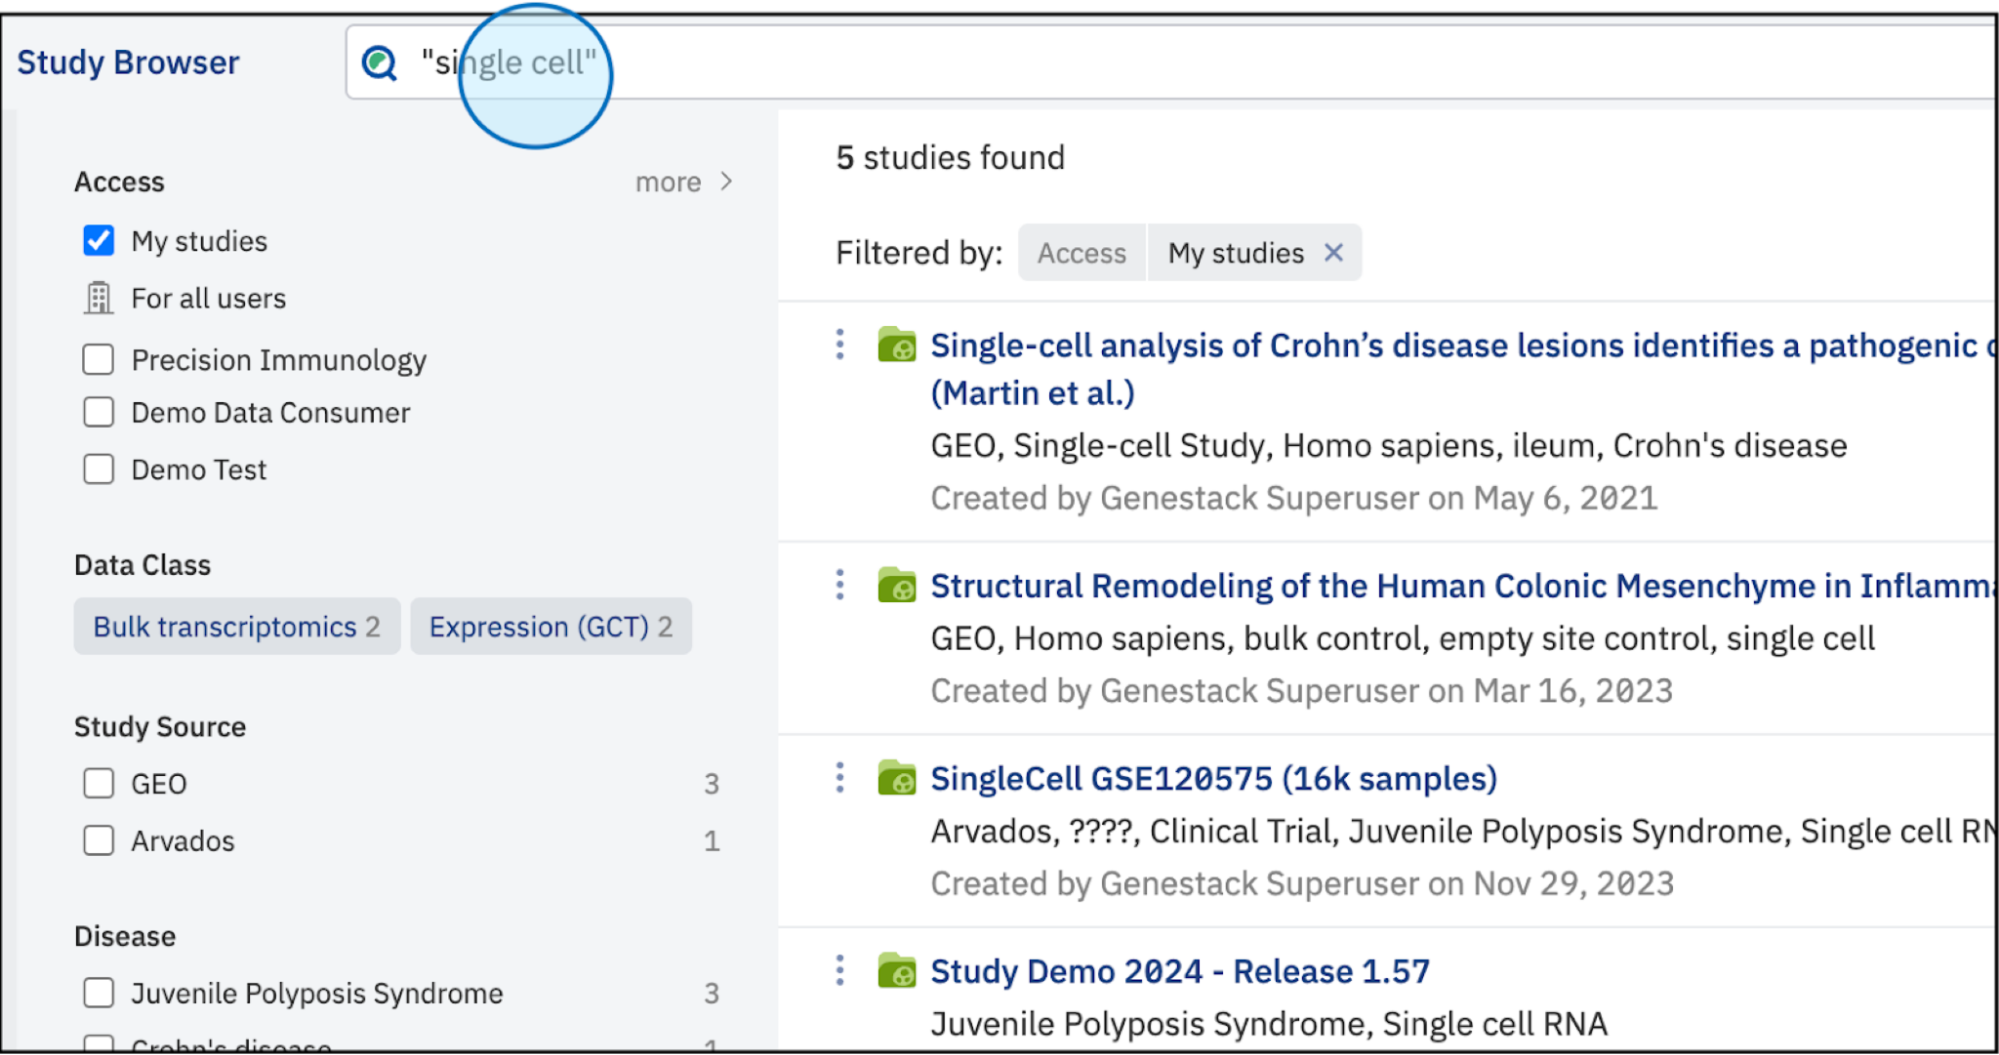
- Use quotes (“ ”) to search for an exact phrase.
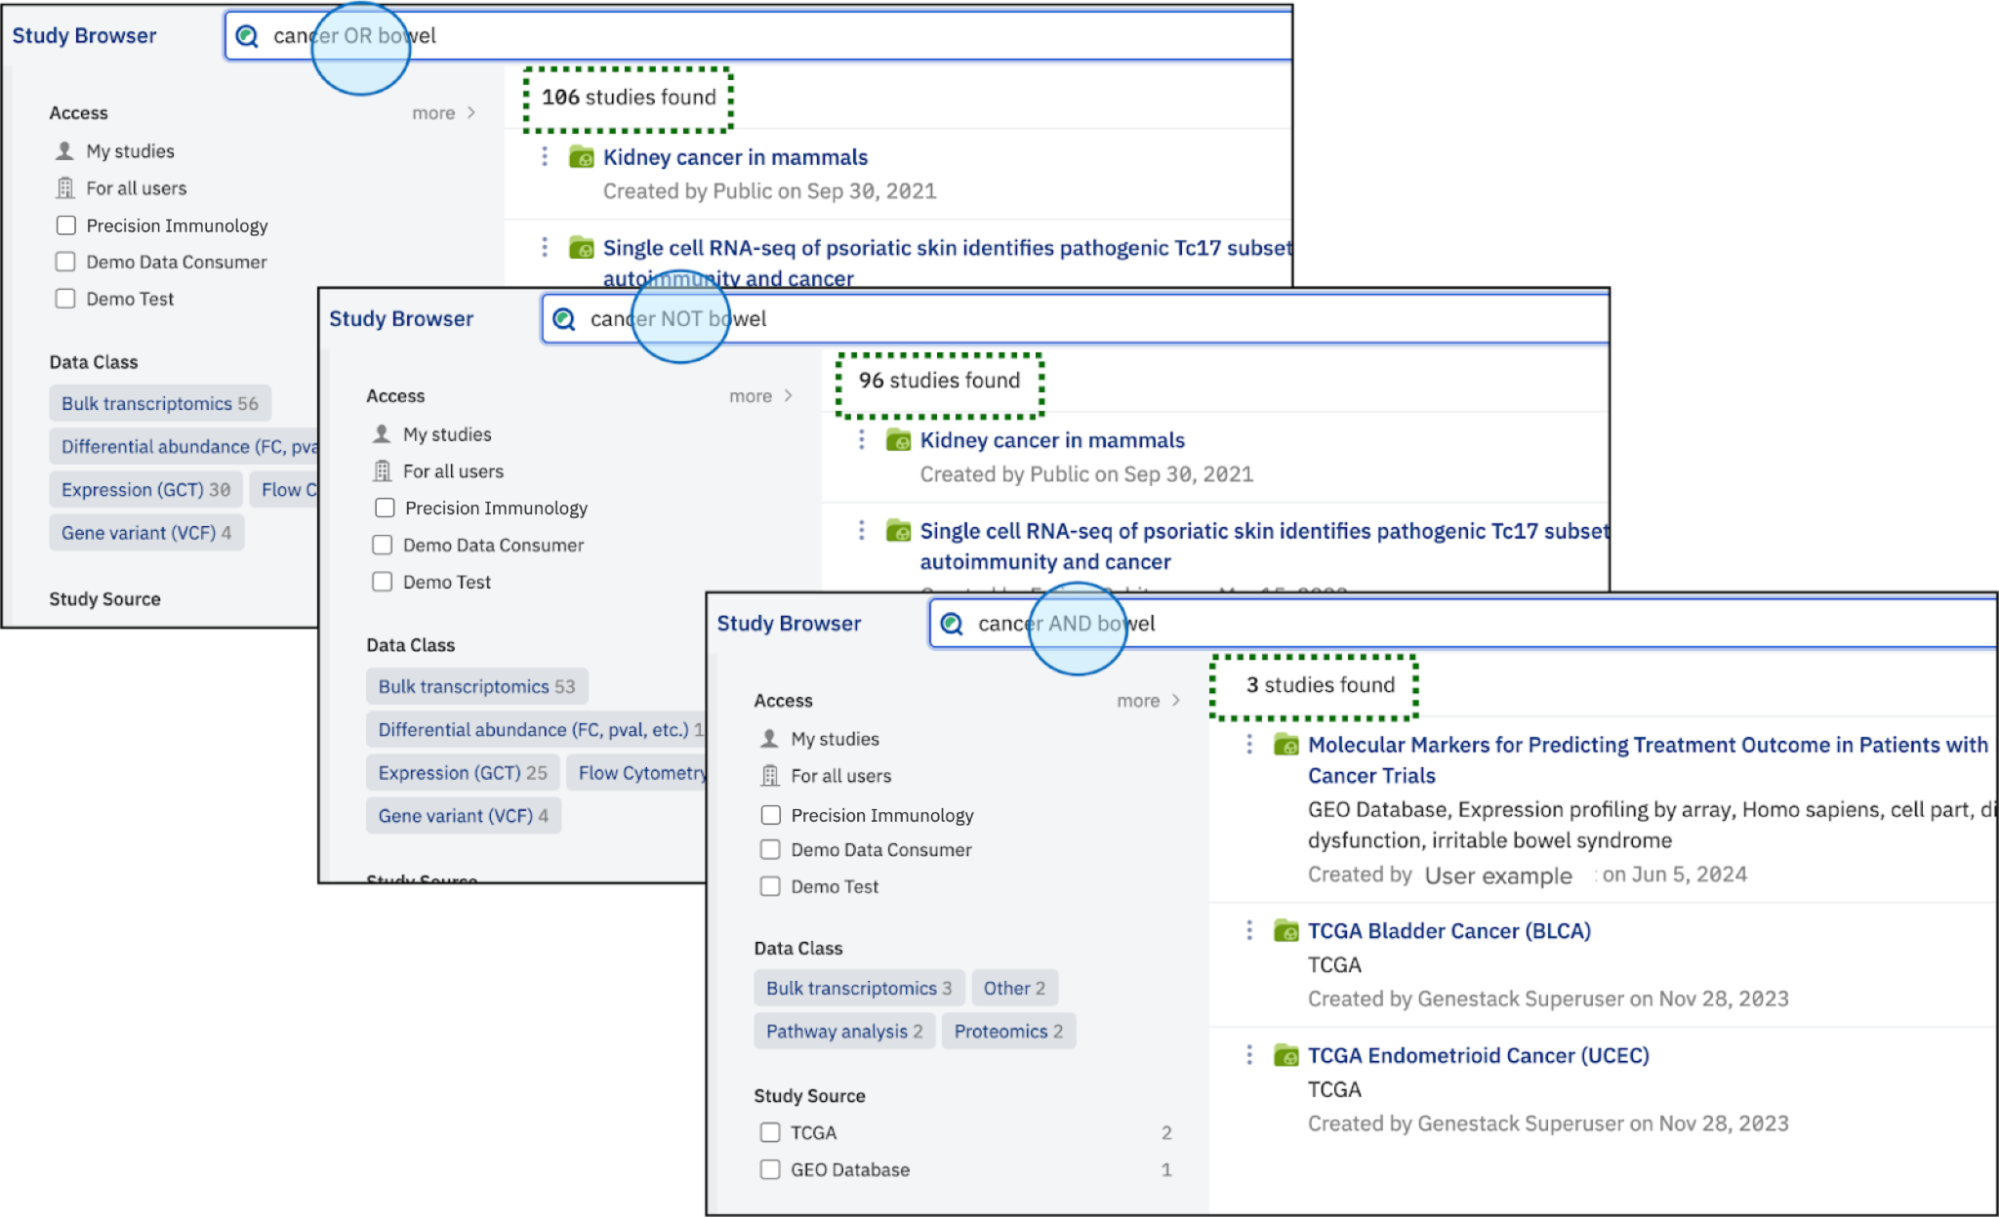
- Terms can be joined with the AND operator (by default the OR operator is used), and they can be excluded with a preceding NOT.
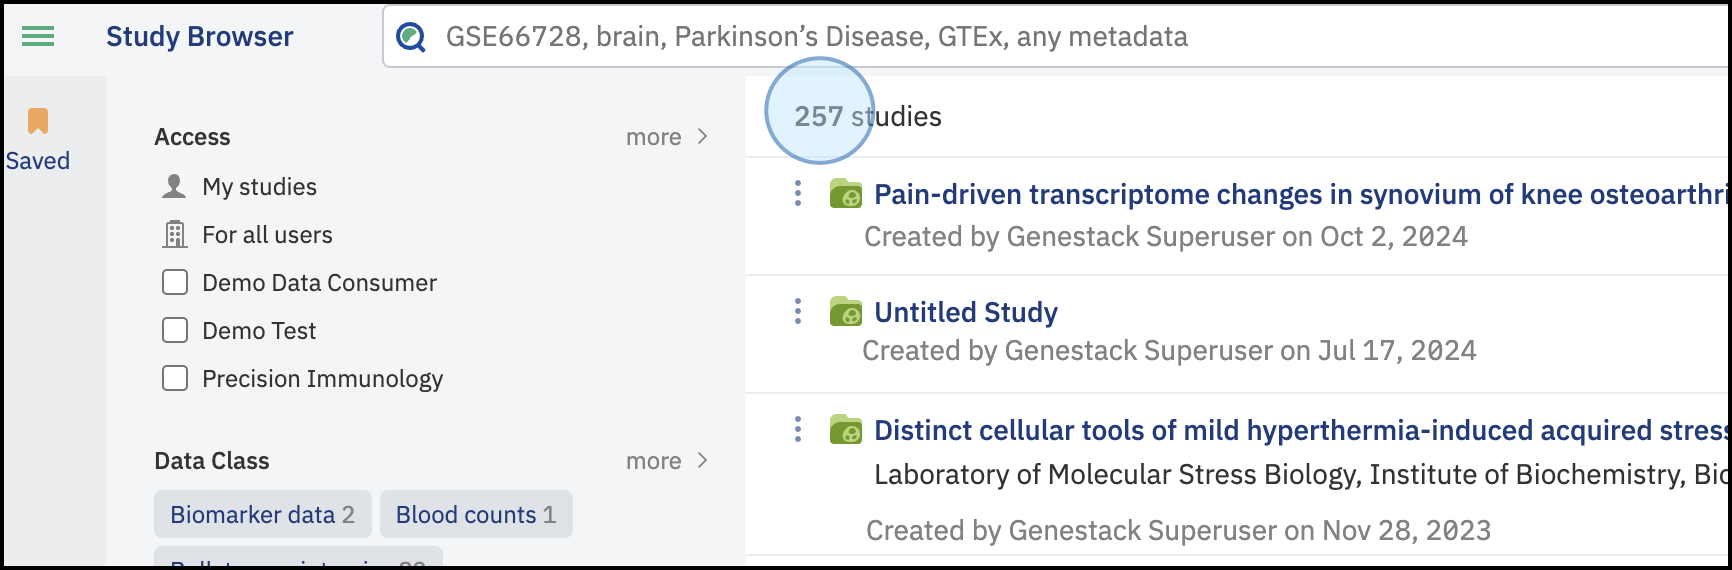
- The main panel displays your search results and filter options. If no search is performed, all studies accessible to your user account are displayed, ordered by date with the newest at the top.
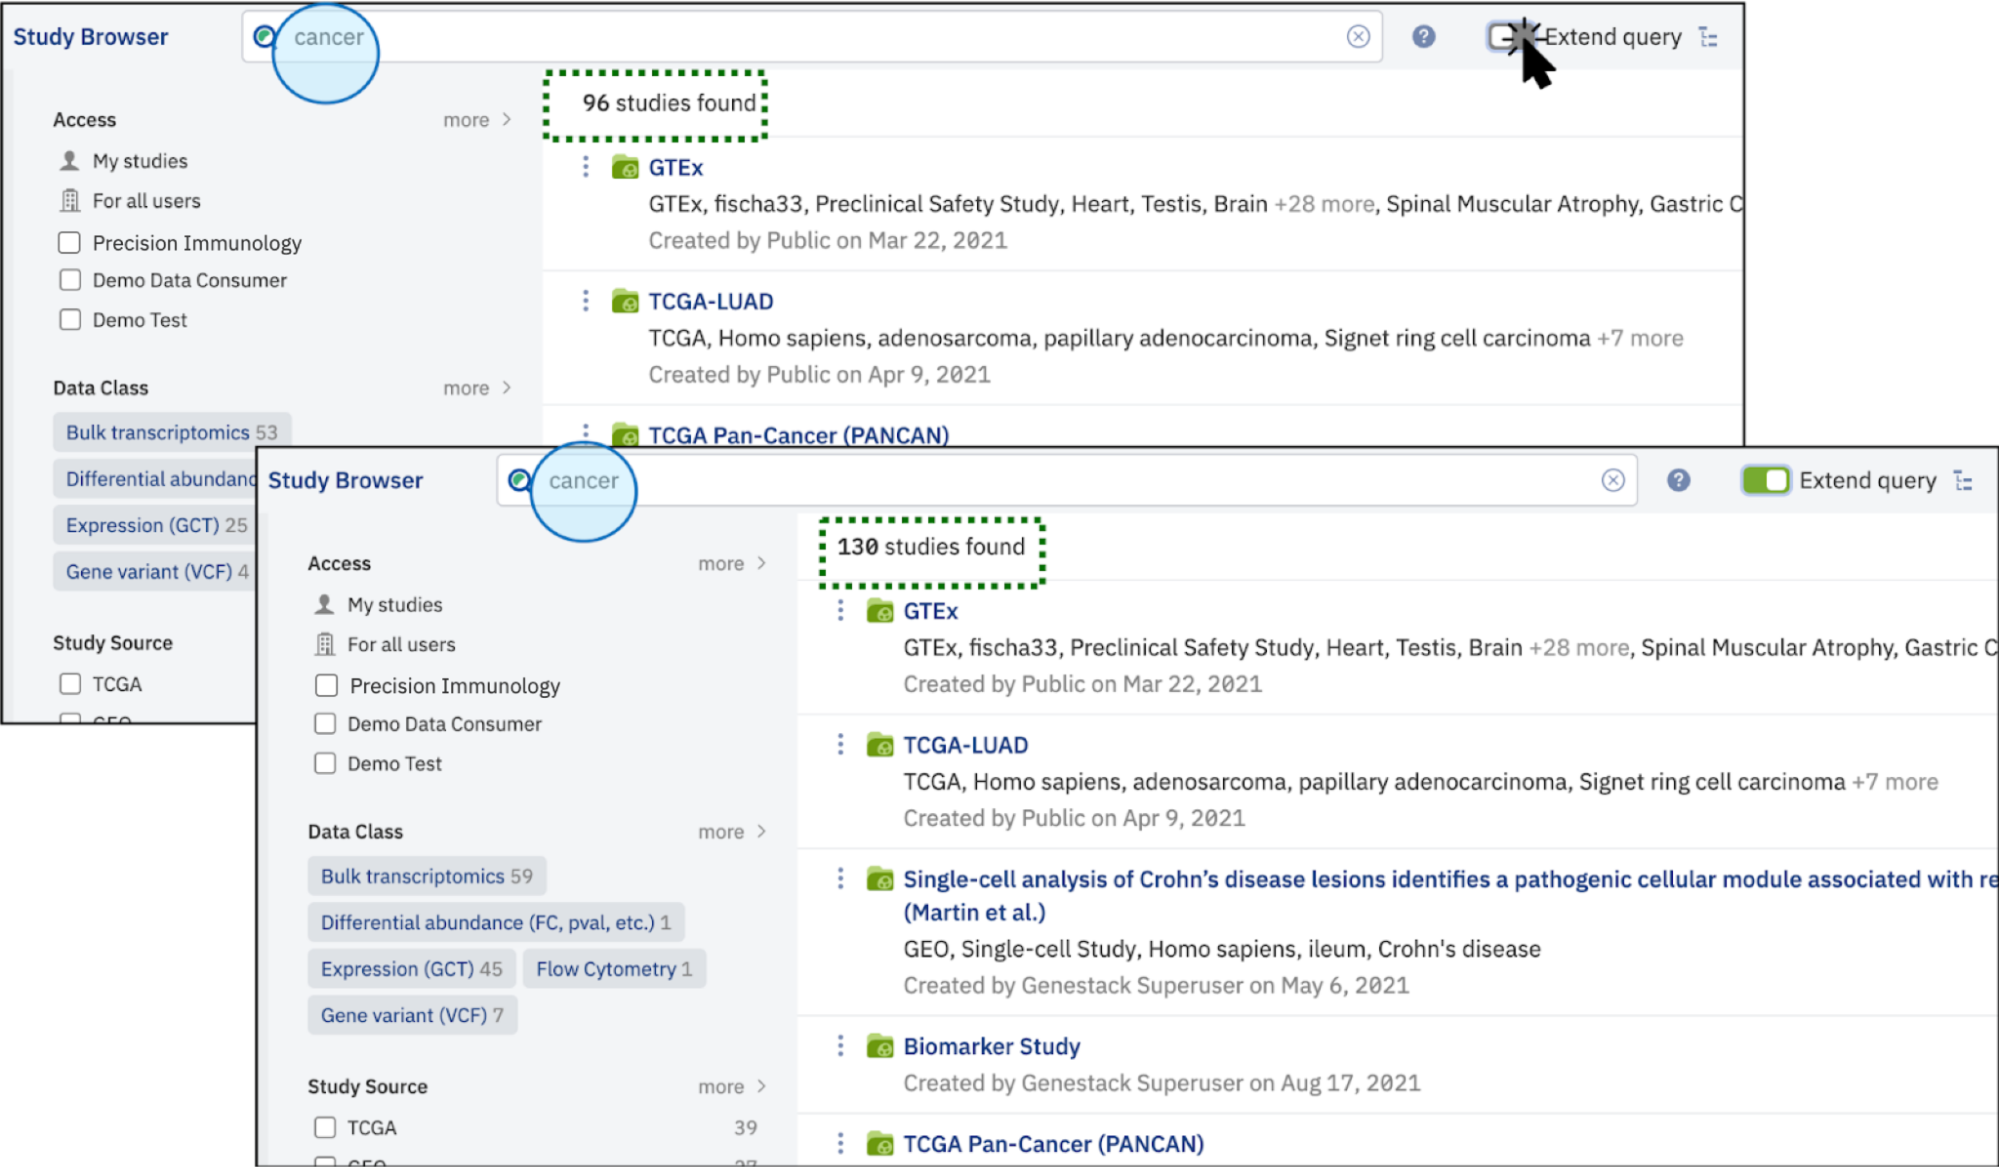
- If your search term matches a term from an ontology with child terms, you can toggle extend query to include child terms in the search results.
- This feature is available if the total number of terms (including synonyms) is fewer than 30,000.
Filter Data
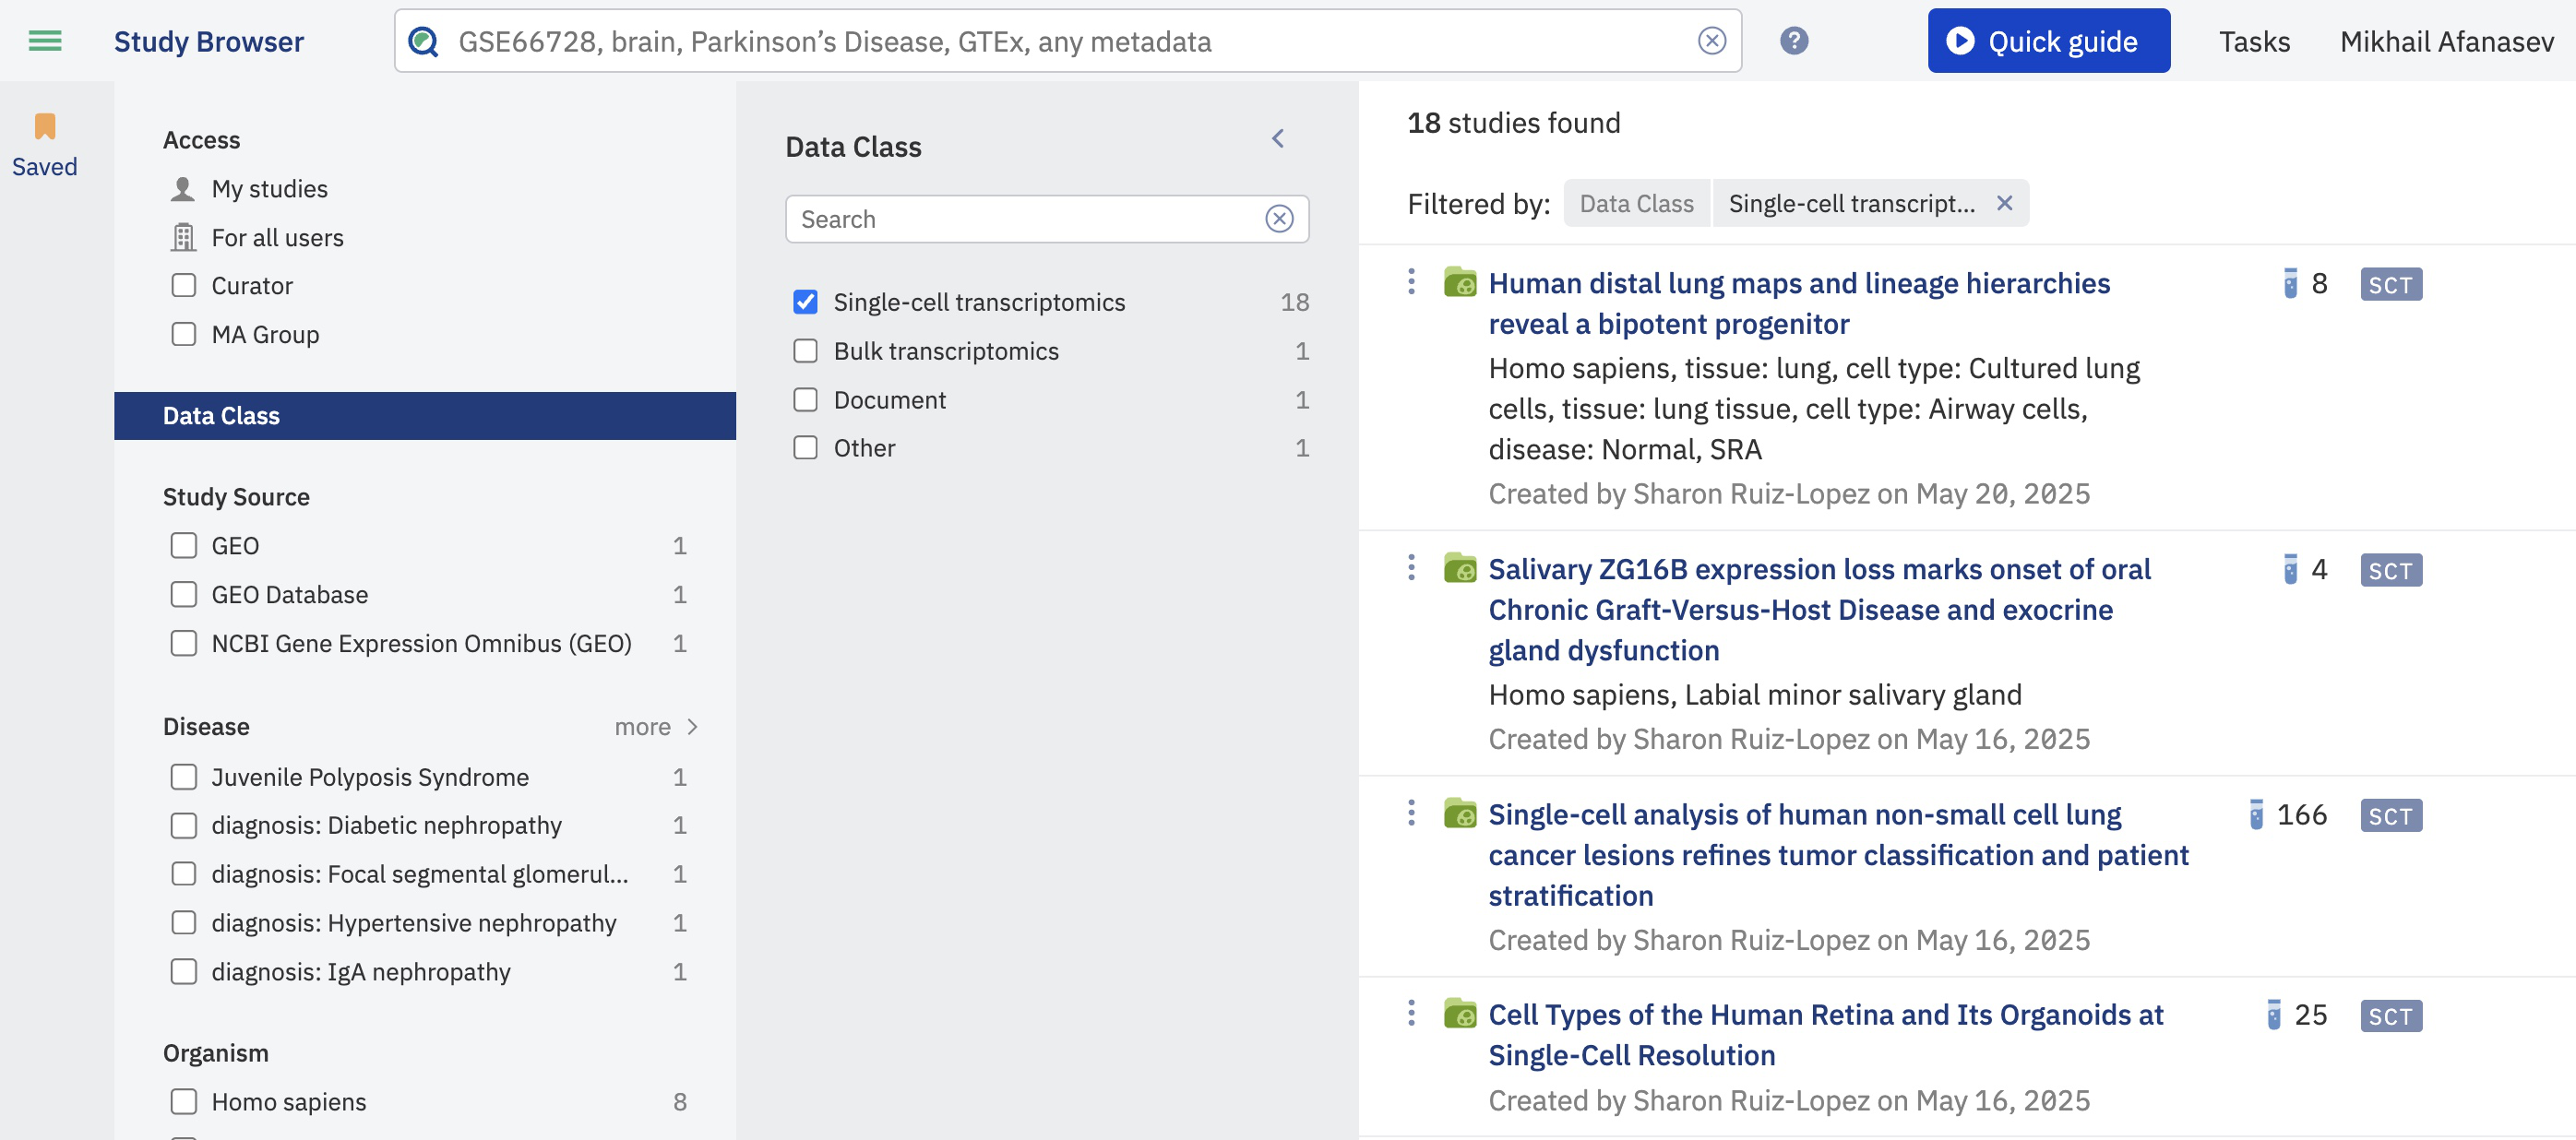
- By default, all studies you have permission to access are displayed. Given the potential number of studies, search and filtering options in the left-hand panel of the Study Browser help you find specific studies of interest.
- You can search by study name, accession number, or any relevant metadata field.
- The facets beneath the search bar allow you to filter search results based on sample metadata fields.
Metadata validity status
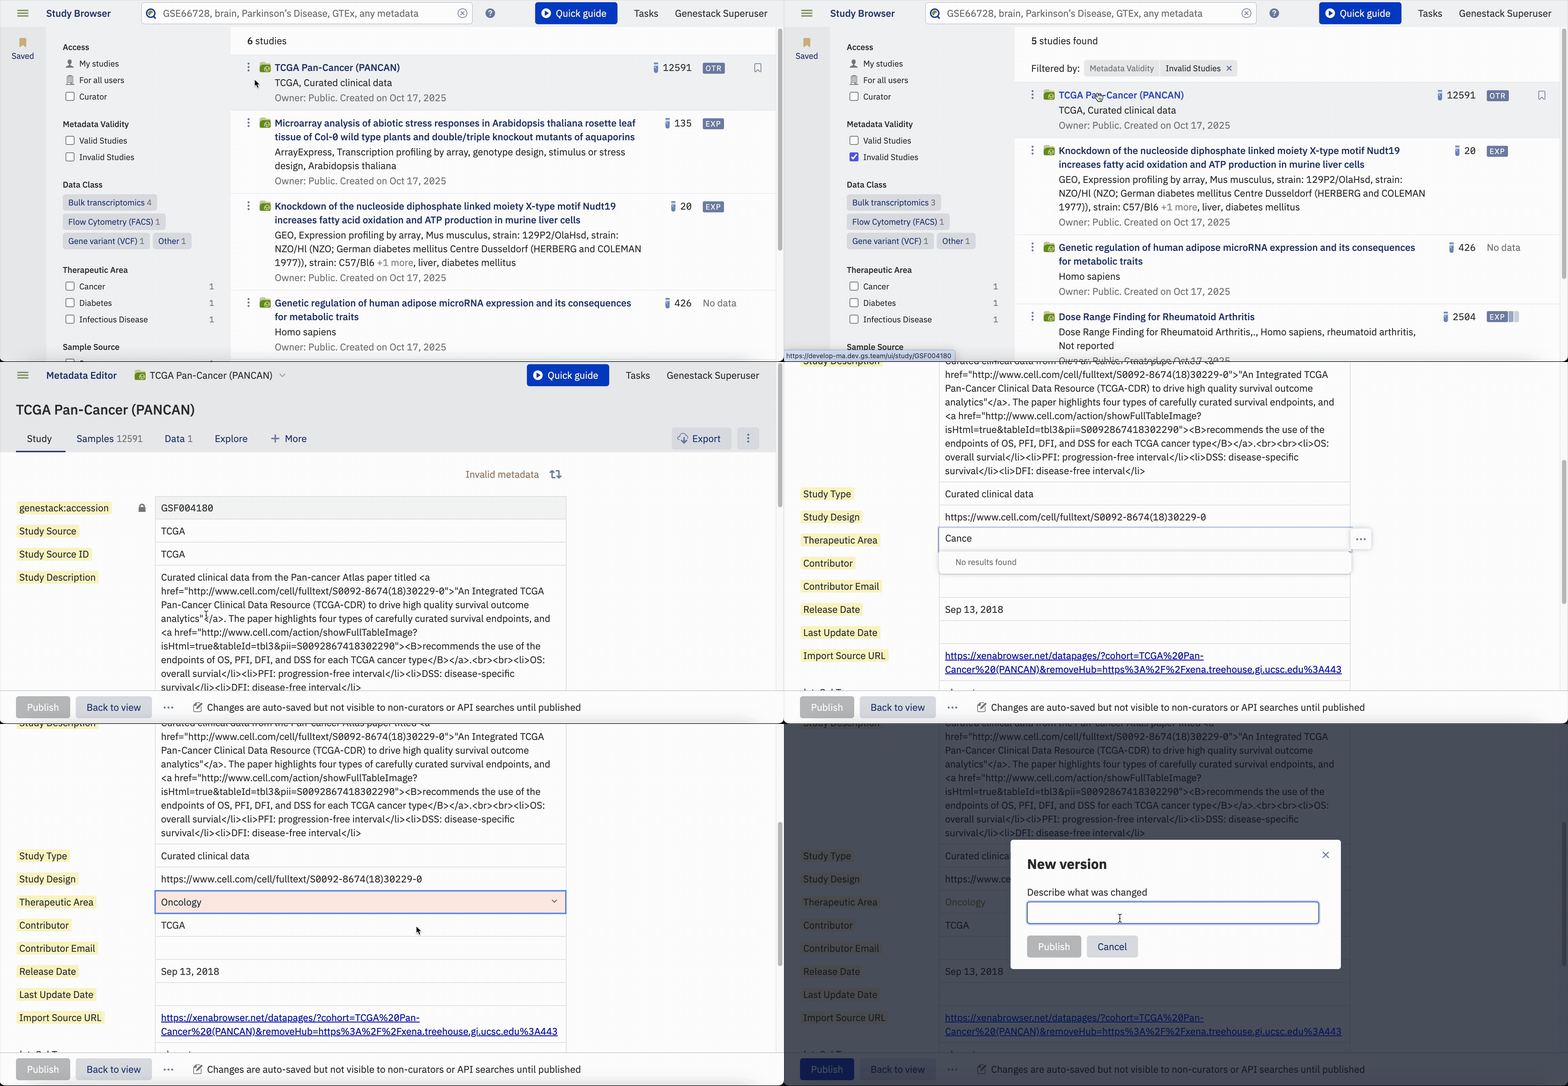
To filter Studies that contain invalid metadata (e.g., Study metadata, Sample metadata, etc.), use the Metadata validity facet. This facet displays both fully valid Studies and those with invalid metadata fields.
Please note that any changes made to a Study can affect its metadata validity, such as changing the Study template, updating validation rules in the current template, or adding/removing metadata groups (Samples, Libraries, Preparations, Data).
Bookmark studies
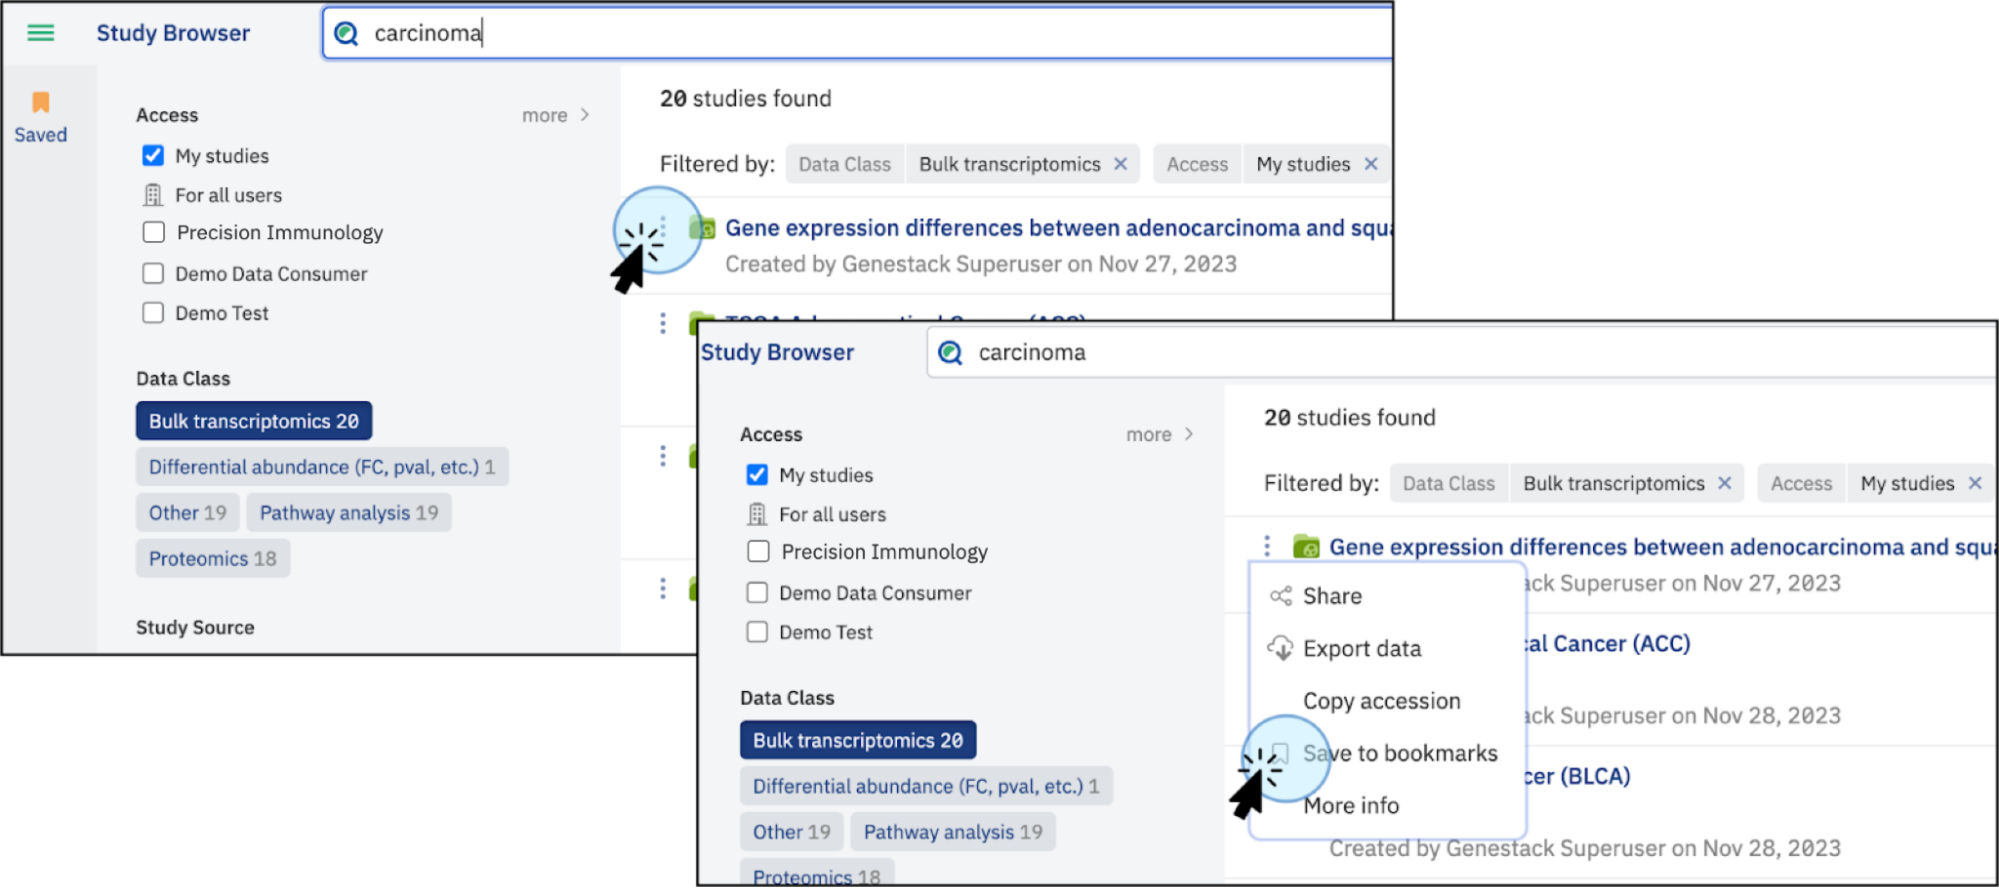
- You can save preferred studies for easy access. To the left of a study title is a three-dot link. Click this to open a menu that allows you to share the study (if you are the owner) and save it to bookmarks.
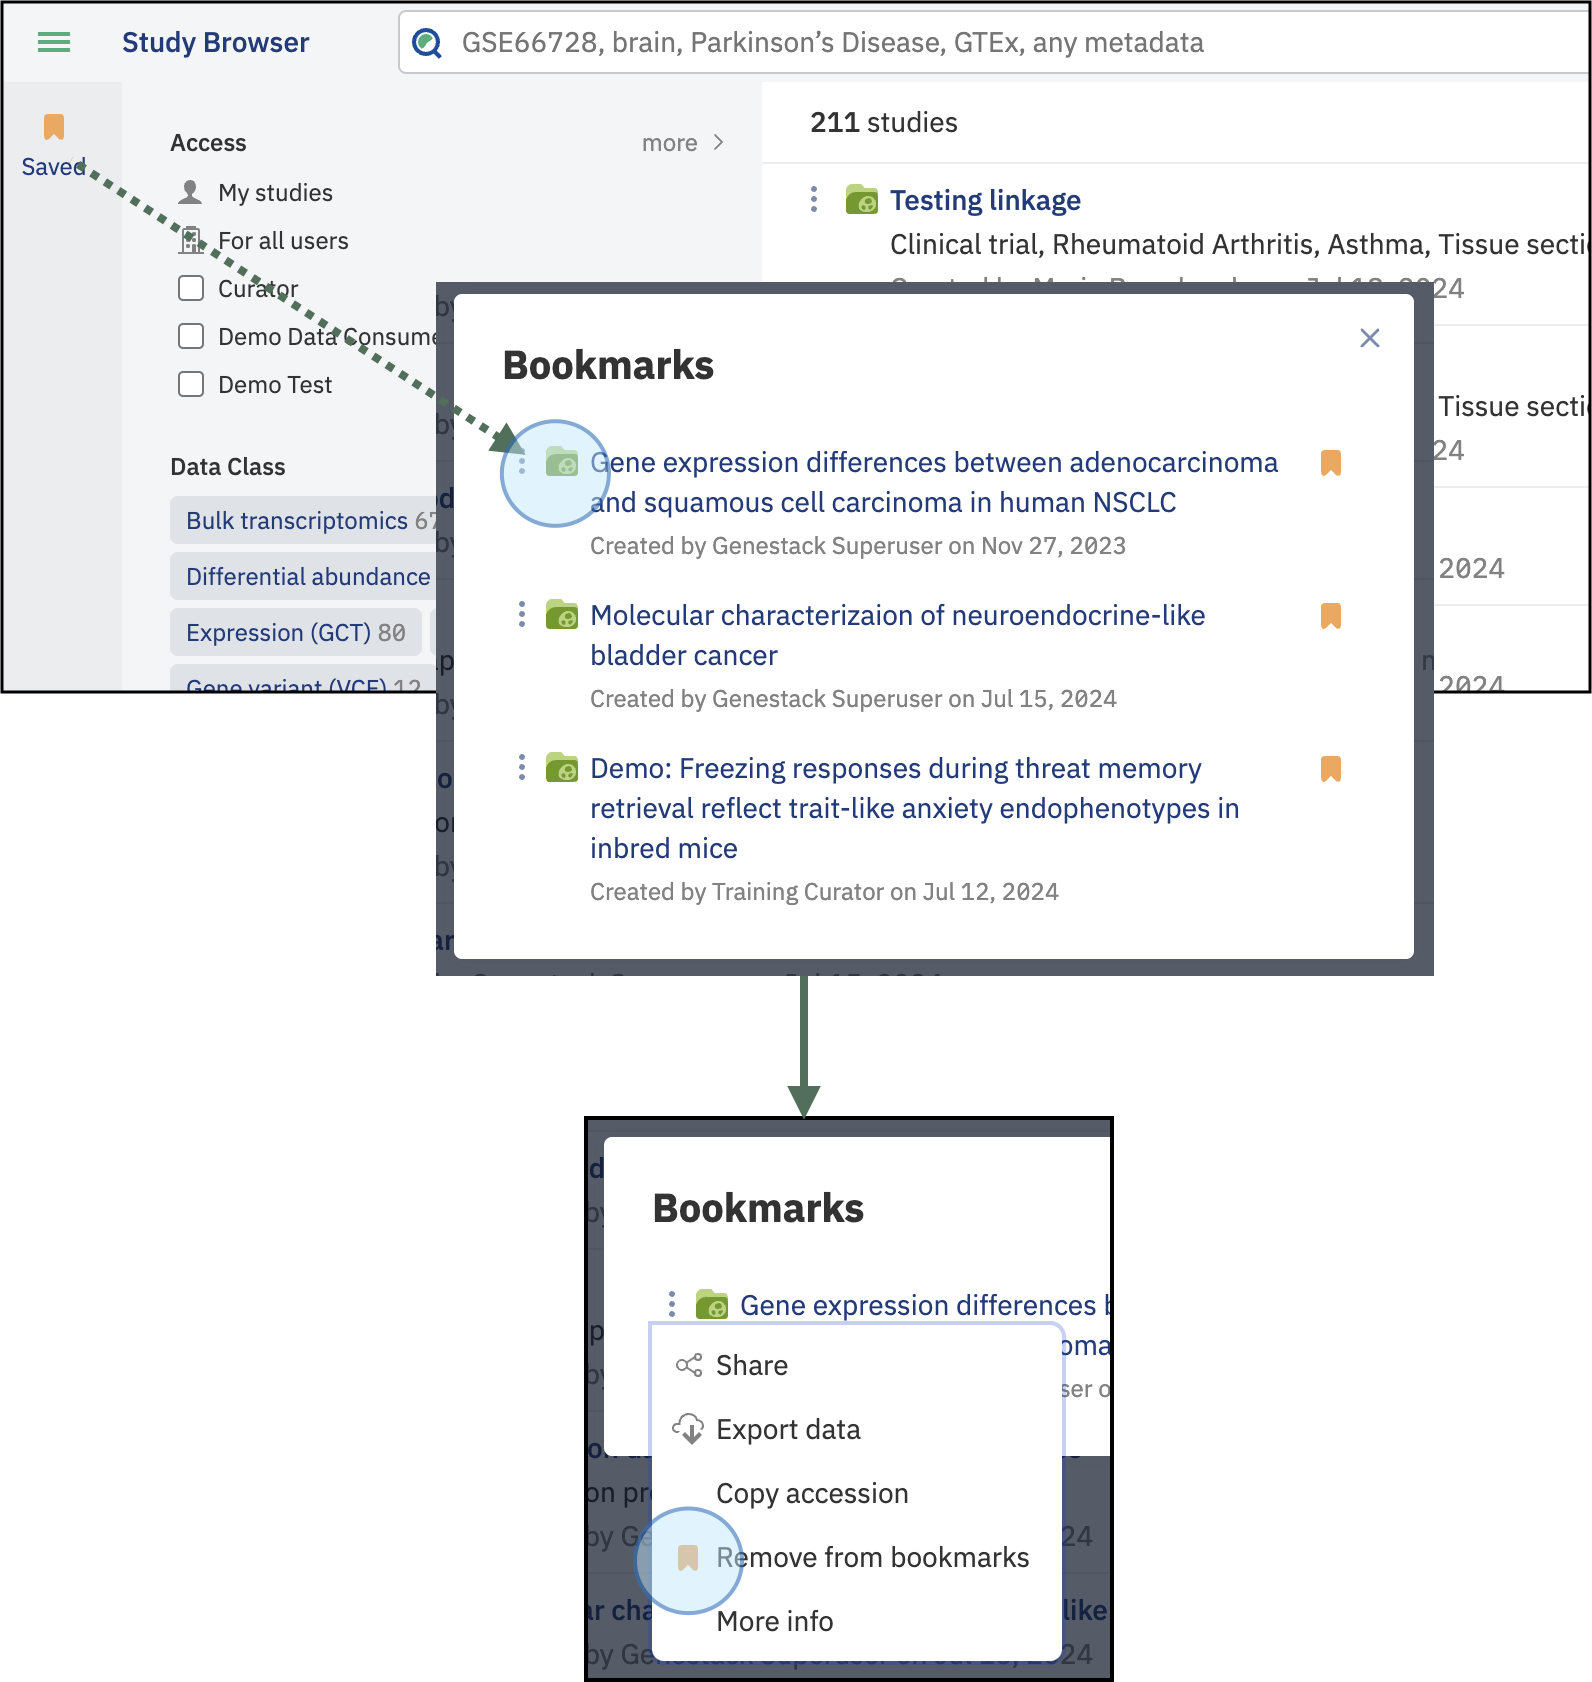
- Bookmarked studies are accessible by clicking on the Bookmarks icon. This section displays your studies and those shared within the groups you belong to, providing access to all studies available to you. Note that studies are not shared with individual users but are instead shared within groups.
Configuring the filter panel
Important
You can only access the Configure facets option if you have the Configure facets permissions. For access, an admin must edit the settings. Refer to the User Setup section for more information.
Users with permission Configure facets can customize which metadata fields are available as search facets.
To do this:
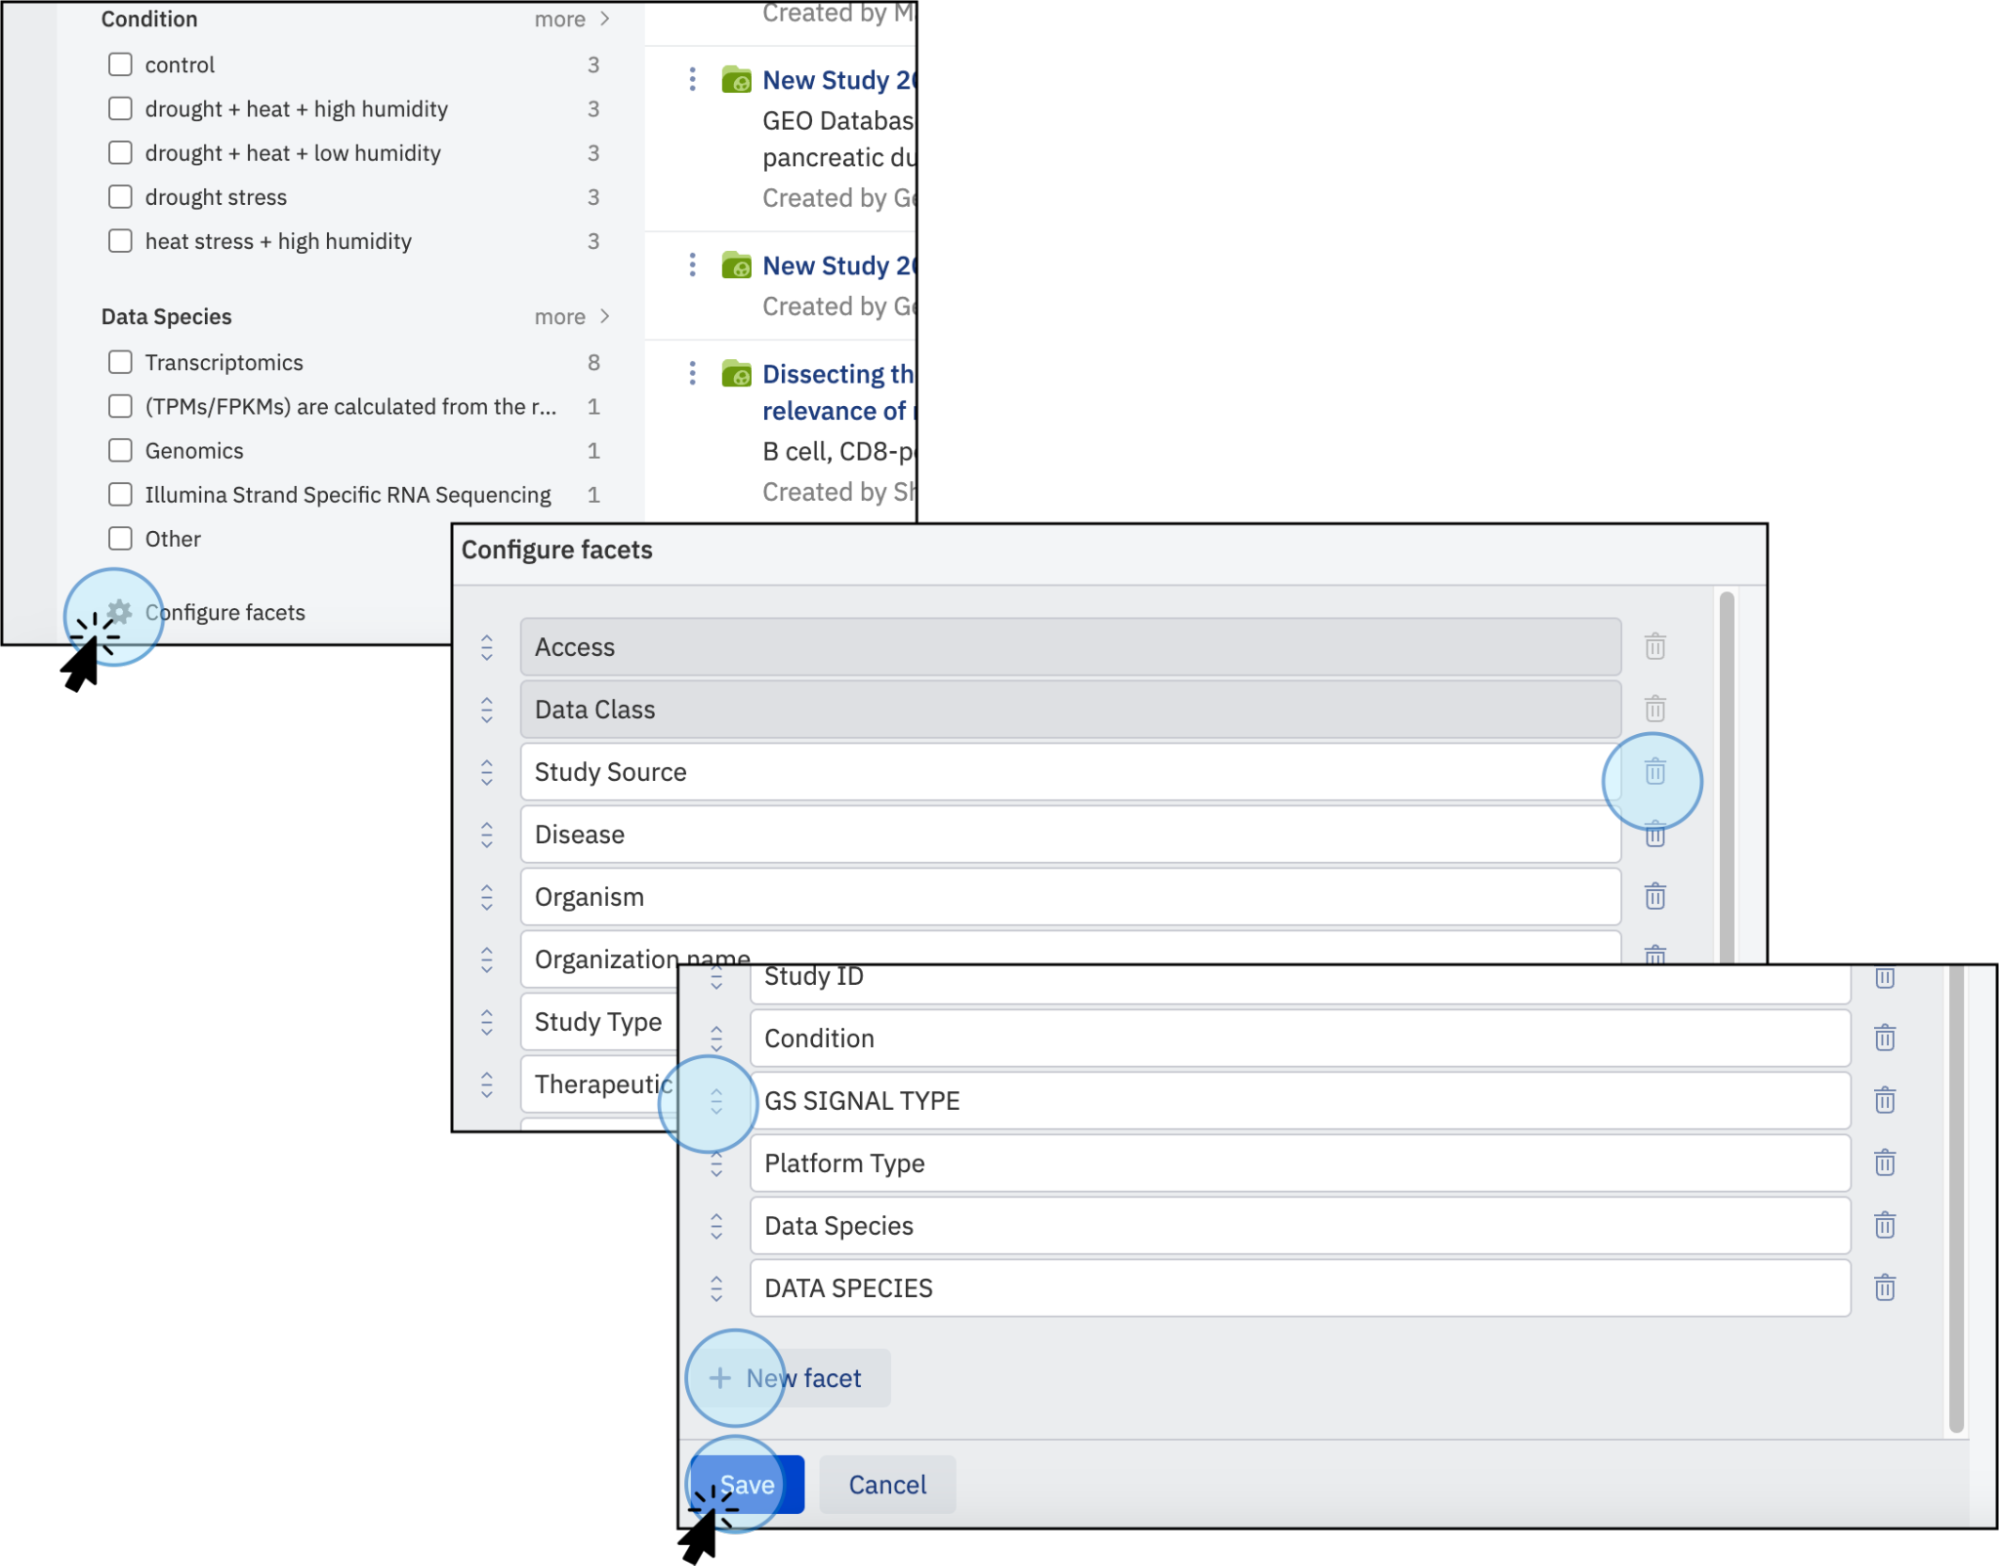
- Click the cog icon at the bottom of the filter panel to change the facets.
- Add facets by clicking the New Facet button.
- Type the exact name of the metadata field (names are case-sensitive).
You can reorder facets by dragging the icon next to the facet name or delete them by clicking the bin icon. Click the Save button to apply changes. The panel will not save if your facet is empty or a duplicate.
Navigation and Help
- Use the shortcut dock in the top left-hand corner of any window to return to the main dashboard.
- Click on Quick Guide in the top right of your window for reference guides and examples on how to use ODM.
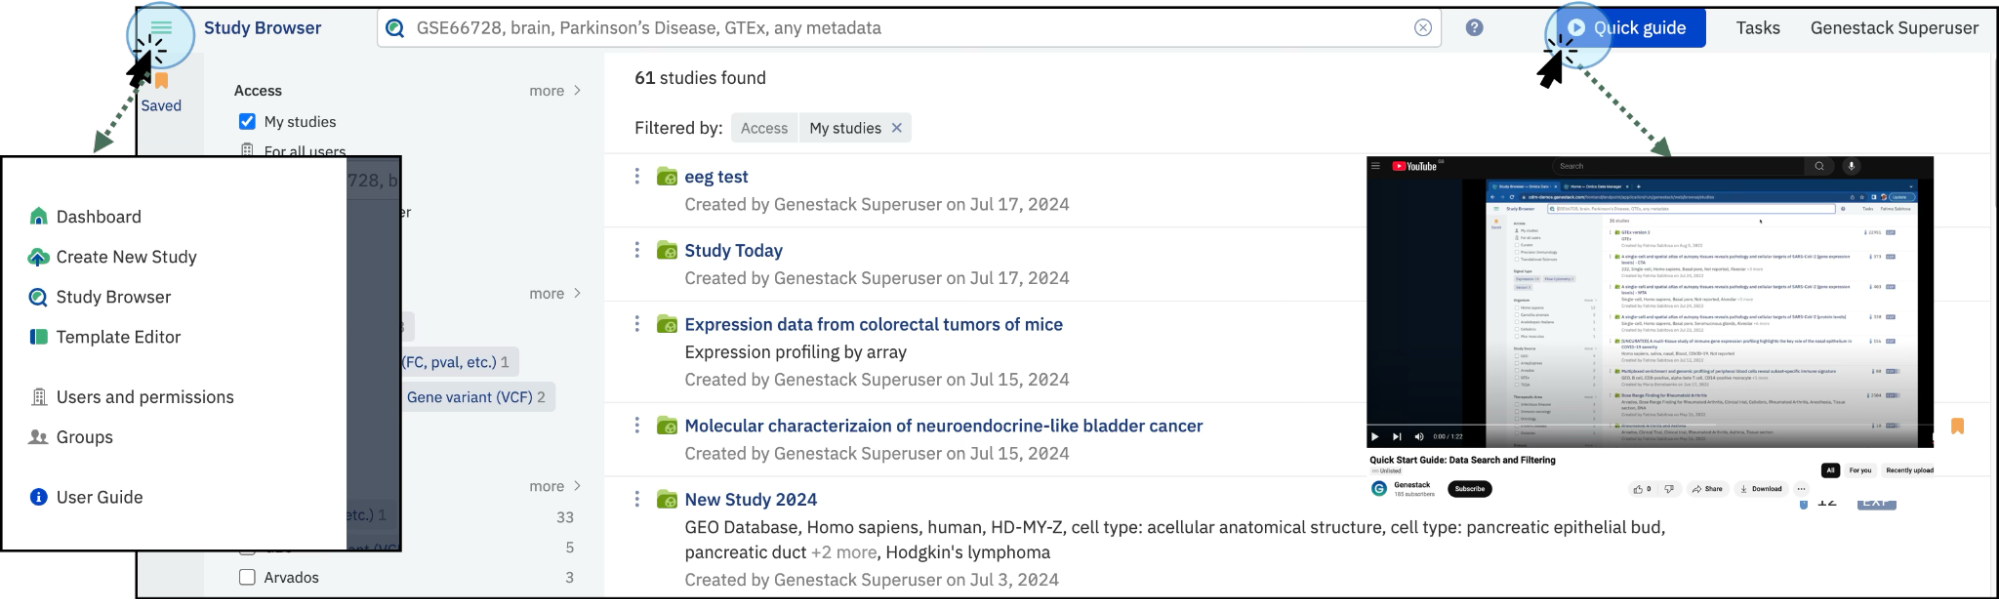
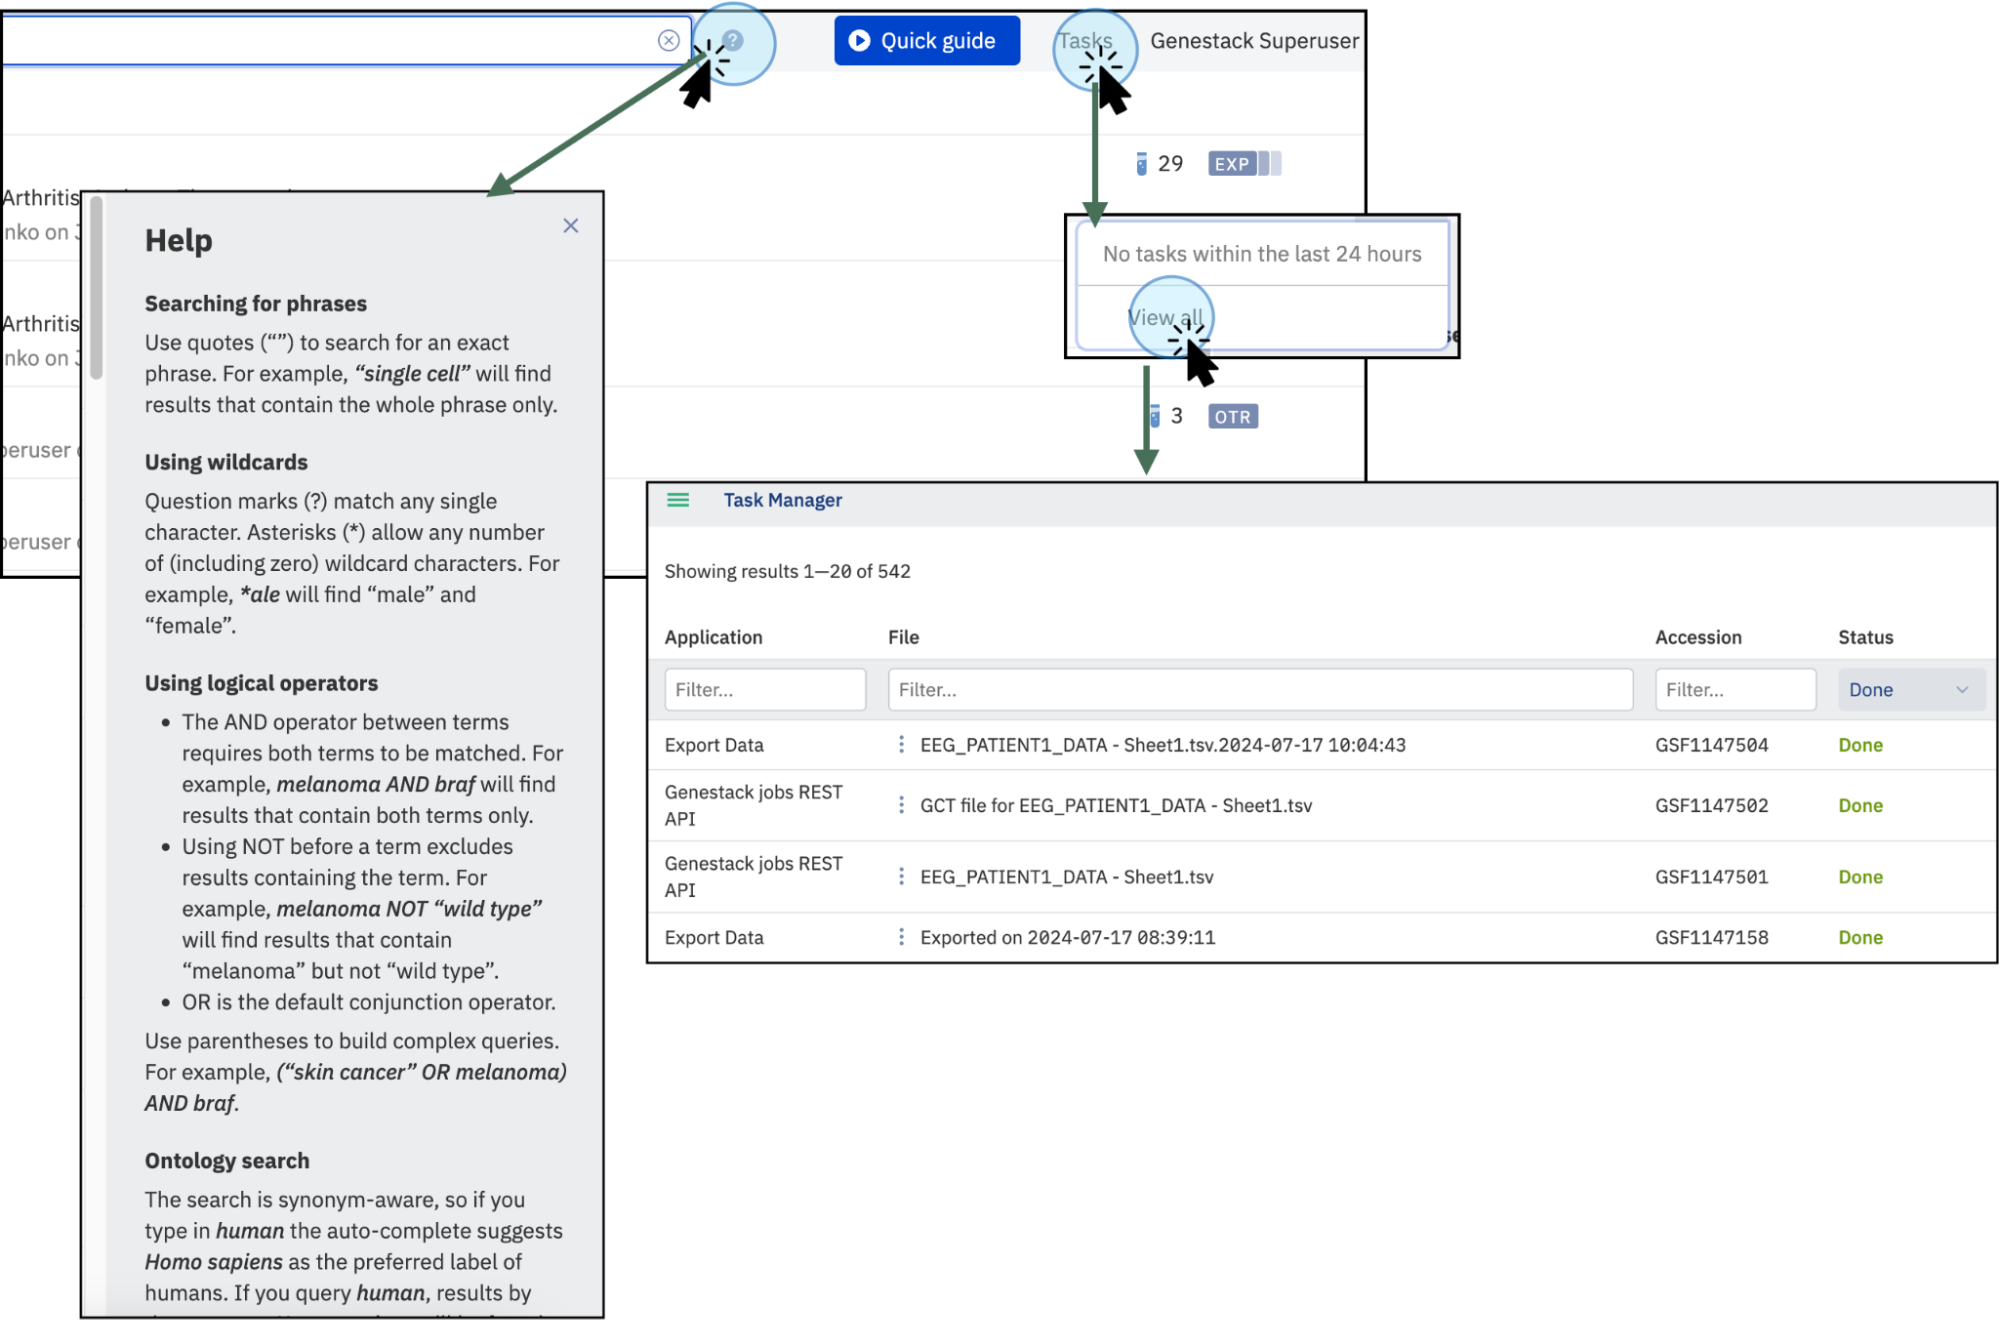
- On the right side of the board, you can access account details and check the status of any tasks you are running.
- Click the question mark next to the search bar to open the search help section for more details about advanced search functionality.