Users and Groups
Accessing Your Profile and Permissions
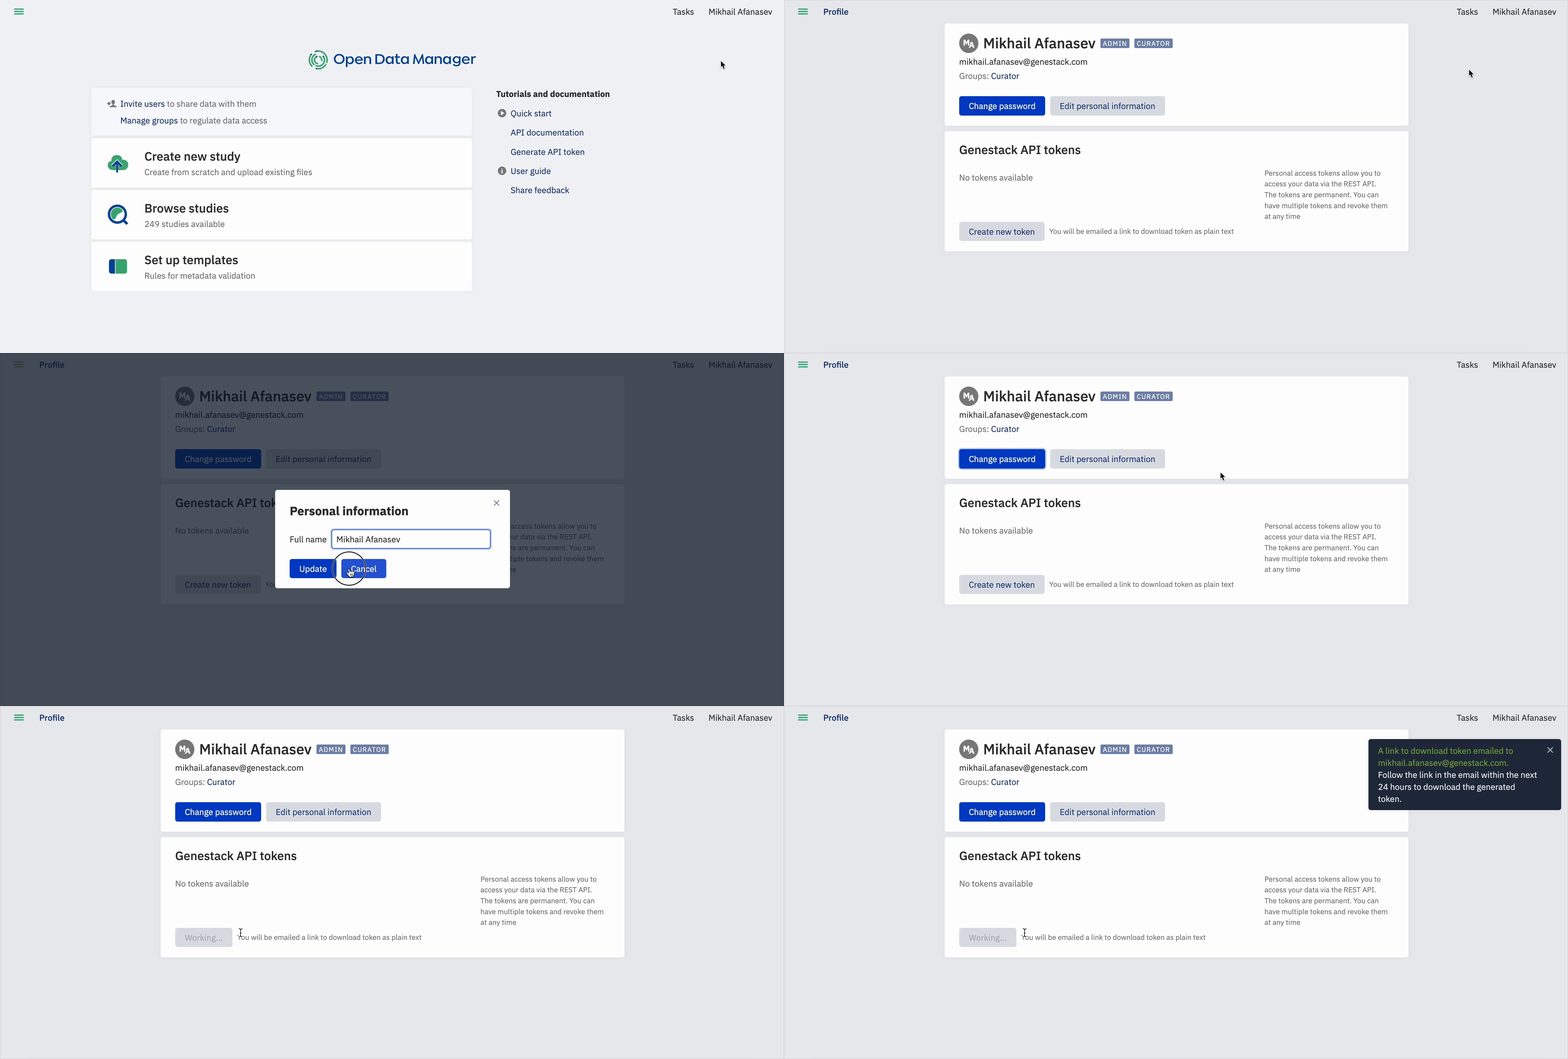
Explore and customize your account by accessing the profile section.
- Log into the ODM:
- Navigate to the ODM homepage.
- Click on your profile (top right of the main page)
- Explore Permissions:
- Click on Profile to access information regarding your user permissions.
- A new window will display indicating if you are an admin and the groups you are part of. This window also allows you to change your password and edit details.
- View Existing Tokens and Create a New Token. You will see any previously created tokens that you can rename or delete if needed. Click on Create a New Token to create a new one. Refer to the section Getting a Genestack API token for more information.
Create/Deactivate users
- Proceed to Users and permissions page. Here you can observe the list of all users and their permissions
- Click on the option + New User.
- Fill in the empty fields and click Add. The new user will be added.
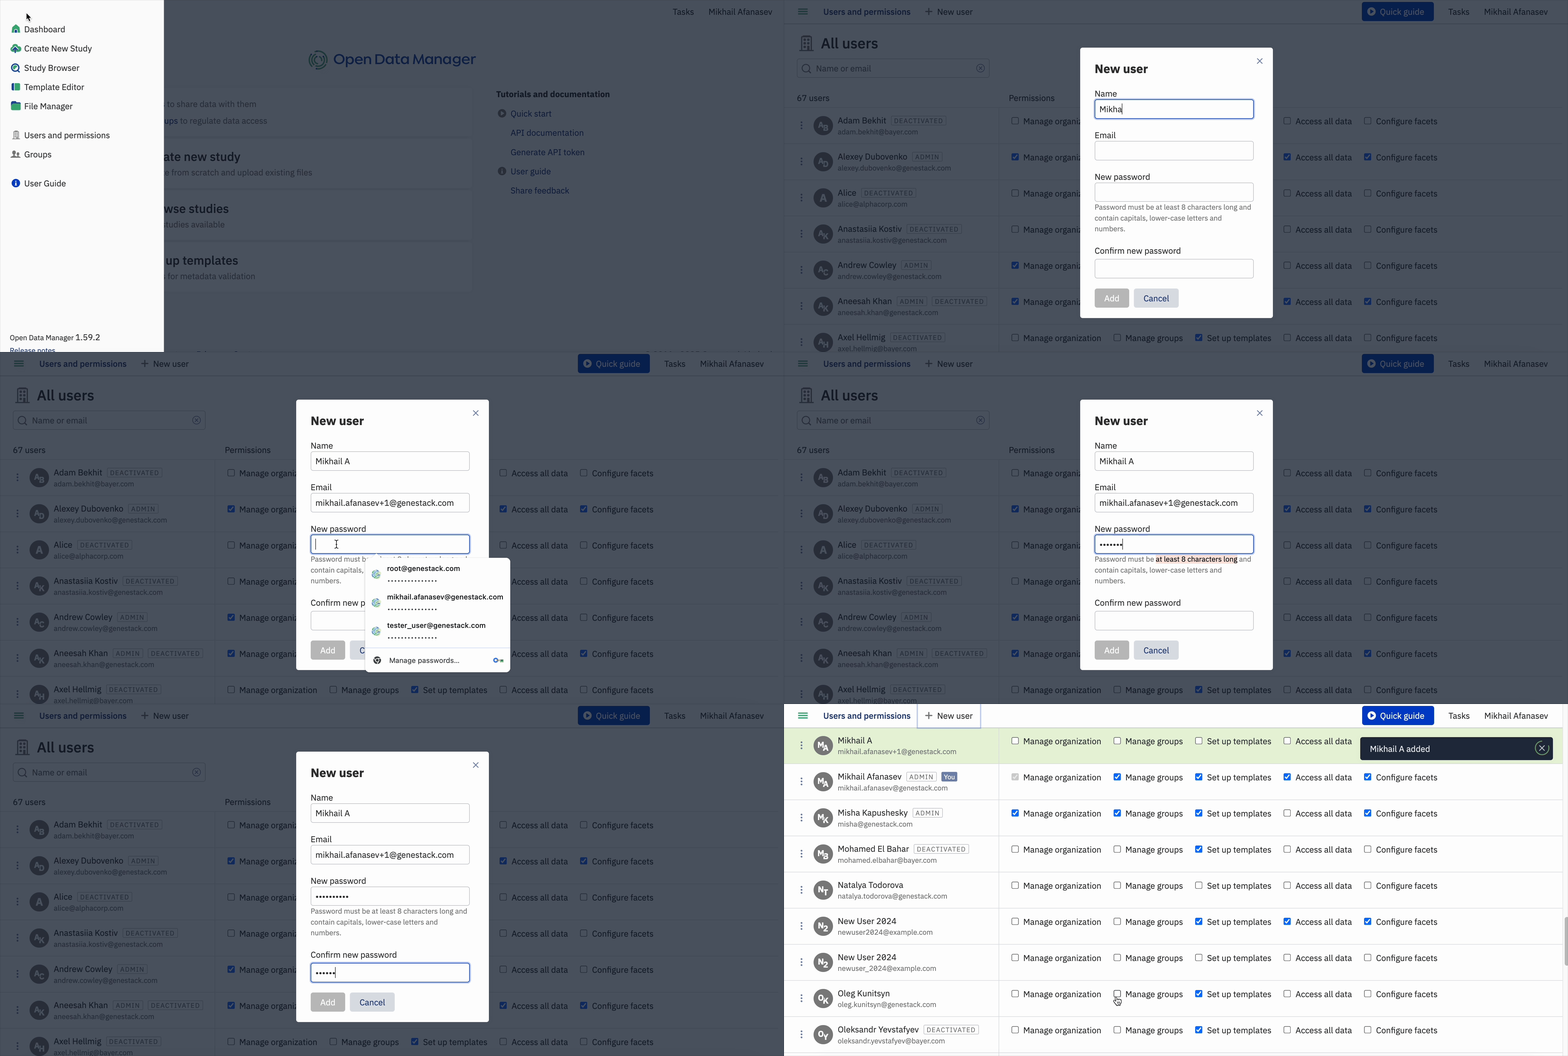
In the ODM it is not possible to delete users, however, you can deactivate them from the menu clicking on three dots button to the left from user icon.
Users and permissions
Understanding the roles, capabilities, and permissions within ODM is crucial for effective data management and collaboration. Each permission defines specific actions users can perform, such as creating, editing, or deleting groups, and managing templates. Users must have the appropriate permissions to carry out these actions, ensuring a secure and well-organized data environment.
Available Permissions
There are five permissions available in the system. Descriptions of the permissions are displayed when you hover over the mouse.
- Manage organization: Create and deactivate users, change their passwords, and grant permissions.
- Manage groups: Access and manage all existing groups, even if you are neither an admin nor a member of the group. This permission is particularly recommended for integration purposes, where centralized management of group permissions across systems is required
- Set up templates: Create and modify templates.
- Access all data: Access all studies in the system. This permission is recommended for integration purposes, enabling comprehensive data access for system-wide operations and integrations.
- Configure facets: Set the desired list and order of filtering facets in the Study Browser for all users on the instance.
Setting and Managing User Permissions
To set or change user permissions, you need to have the Manage organization permission:
-
Accessing the Permissions Menu:
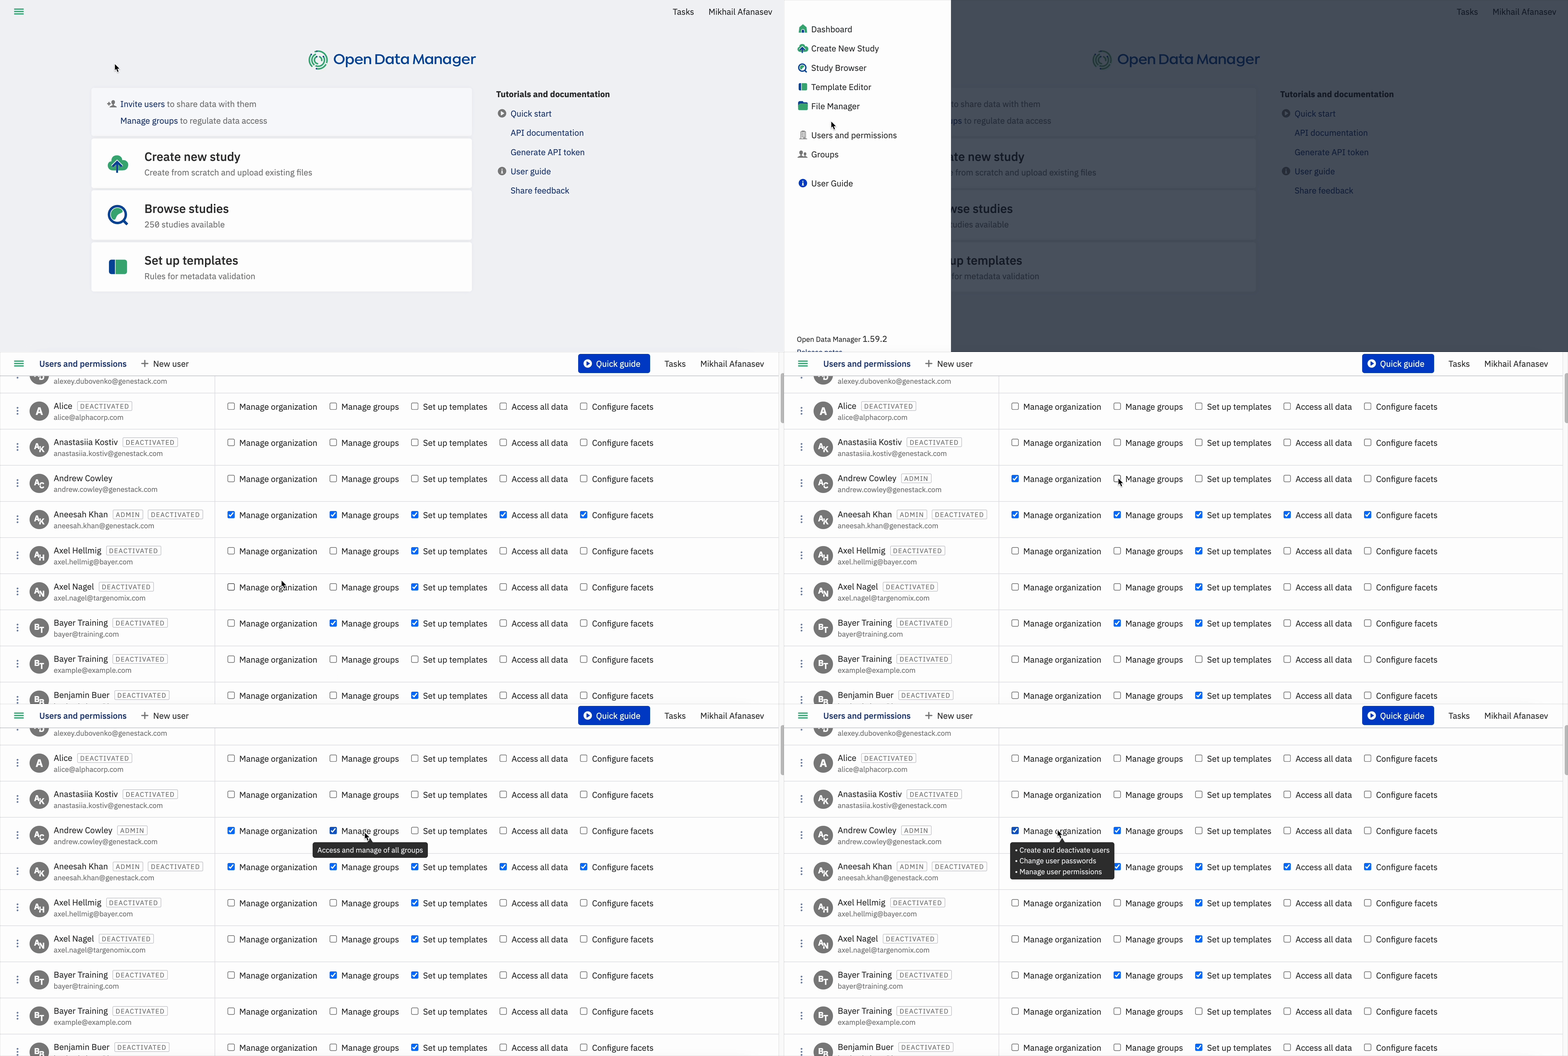
- On the main dashboard, click on the three-line menu button at the top left.
Permissions required
If you have the Manage organization permission, this menu will display the option Users and Permissions. If you do not have this permission, the option will not be available.
-
Managing Permissions:
- If you have access, click on Users and Permissions. This option will open a new window where you can see all the users within your organization. You can grant or revoke permissions by ticking the corresponding boxes for options such as Manage groups, Set up templates, Access all data, and Configure facets.
- Use the search bar to find users you want to grant or revoke permissions to.
- Hover over the permissions to view a brief description of the permissions capabilities.
Groups
User Groups in ODM facilitate collaboration and data sharing, representing departments, project teams, or any other preferred structure.
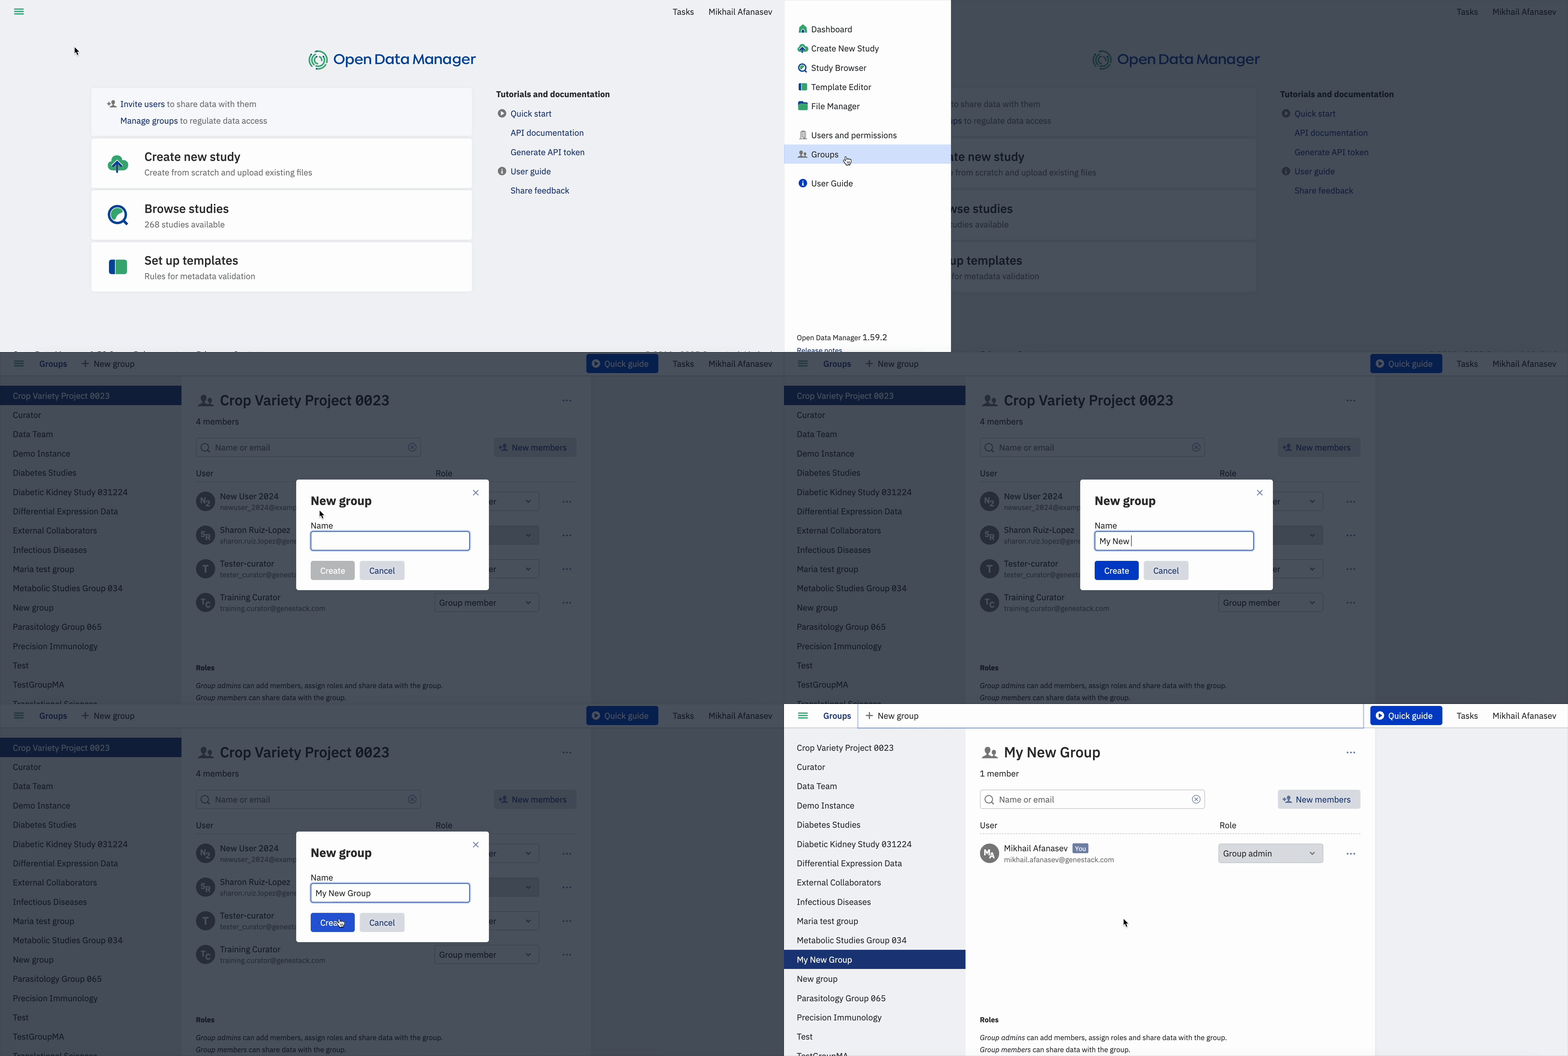
To view the list of available Groups in your instance, click on the three-line menu at the top left of the dashboard. A menu will appear.
The new window will display a list of available groups in your instance. Click on each group to view its members. This window also shows the primary roles within each group: the Group Administrator, who can add members, assign roles, and share data with the group, and Group Members, who can share data with the group.
You can also add new members to groups or create new groups. See the instructions below for more details.
Permission limitations
Permissions required
To manage groups (create, edit, or delete), you must have the Manage Groups permission.
The Groups page in ODM provides a list of all groups to which a user belongs. However, user capabilities are restricted based on their assigned permissions. Below are the key limitations depending on user permissions:
- Access to Groups:
- With Manage Groups permission: Users can access all groups within the system, irrespective of their membership status.
- Without permission: Users can only access groups of which they are members.
- Creating a New Group: Any user can create a new group through the user interface.
- Adding or Removing Members from a Group:
- With Manage Groups permission: Users can add or remove members from any group.
- Without permission: Group Admin can add or remove members and edit roles only within groups they belong to.
- Deleting a Group:
- With Manage Groups permission: Any user can delete any group through the interface.
- Without permission: Group Admin can only delete groups they are a part of.
Creating a Group
To create a new group manually, follow these steps:
-
Access the Groups Section
- Click on the three-line menu button at the top left of the dashboard to access the
Groupssection.
- Click on the three-line menu button at the top left of the dashboard to access the
-
Create a New Group:
- In the Groups window, click on the +New Group button at the top of the window.
- Enter a name for the new group in the new window that appears.
- Click "Create" to finalize the creation of the group.
- A new window will be displayed showing the new group has been created. By default, the user who creates the new group is assigned as the Group Admin. It is important to notice that each group requires at least one group admin.
Managing Groups
Once you have created groups, you can edit details such as members, members' roles (group admin or group members), and delete groups.
To manage groups in the interface, navigate to the section Groups (instructions described above) and select the group you want to manage.
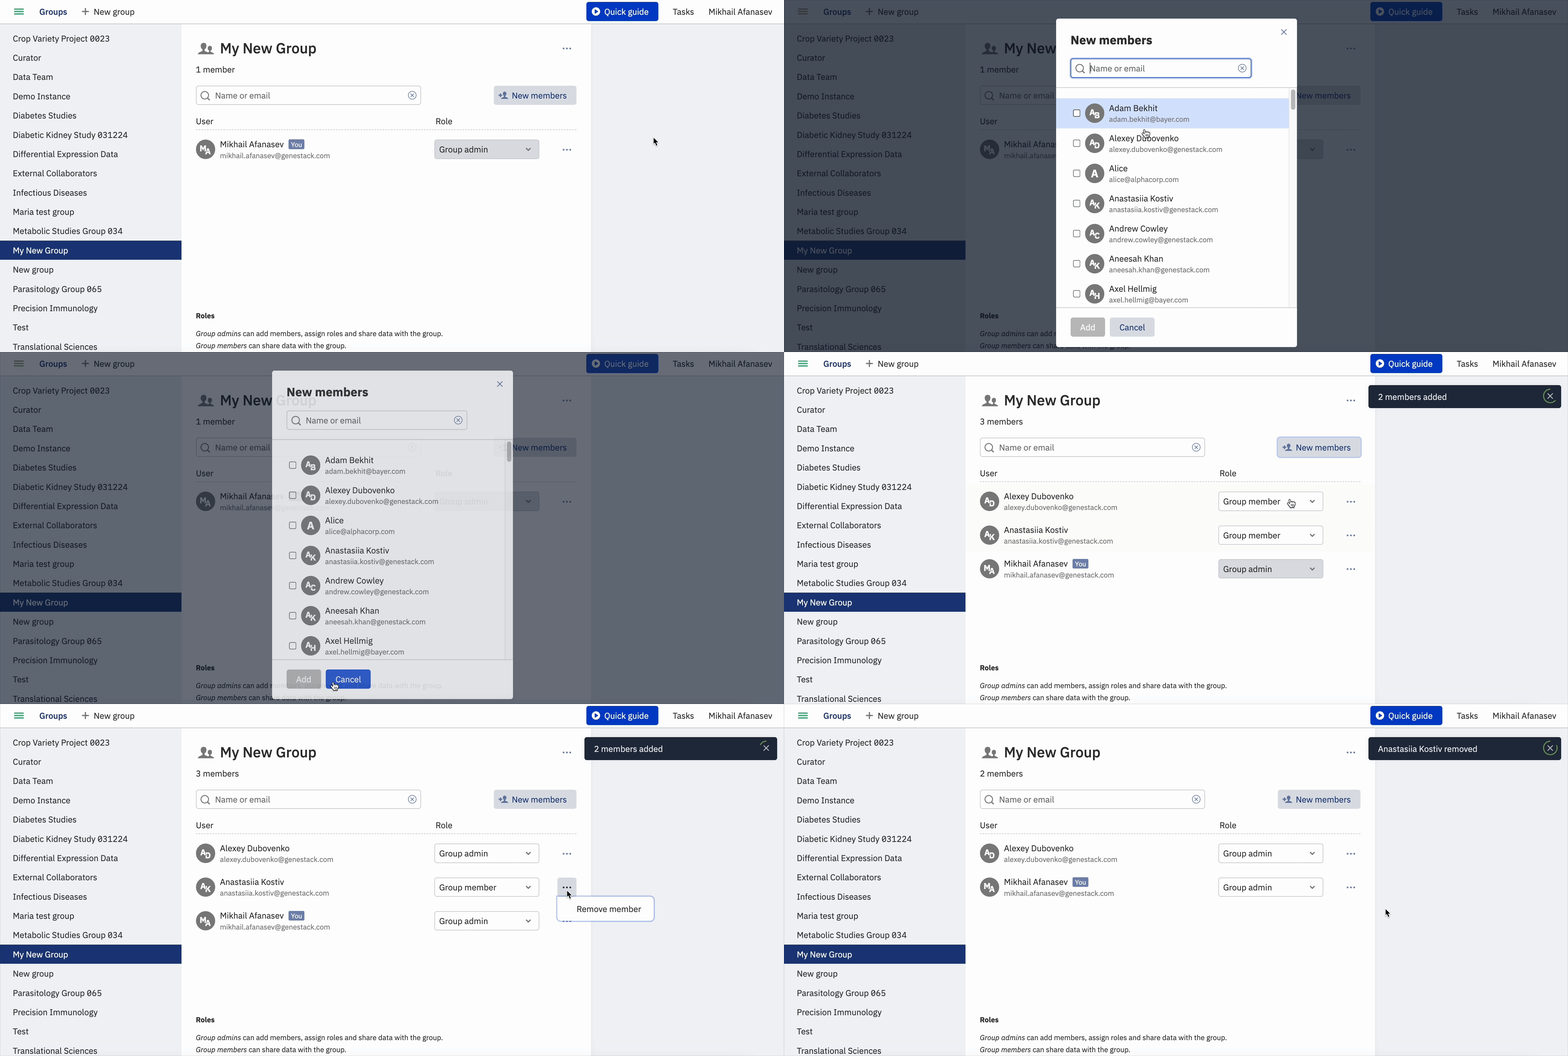
Add New Members via Interface
- Click on the +New members button to add members to the group.
- In the new window, you can select members from the list or use the search bar to find specific users.
Confirm New Members:
- After selecting the members, click Add member to confirm. The group will now display the recently added members.
Edit Group Details
- You can edit the roles of group members by clicking on their role descriptions. You can change members to administrators or vice versa. Note that each group must have at least one administrator.
- To remove a member, click on the three dots next to their username.
Curator Group
The Curator group is a special group granting edit permissions to its members. Curators can import new studies and edit any study shared with them.
Only Administrators can add or remove members to the Curator Group. To Add new members, simply follow the instructions described in previous sections and select the User to add.
- Briefly, navigate to the Groups section. Select the group Curator.
- Click on +New member and select the member to add.
- Confirm the changes.
- Once the user is added, the title will be displayed on its profile.
Curators can explore, edit, and curate data. However, some limitations are set based on their permissions:
- Curators with Manage Groups permissions: Members of the Curator group with full edit permissions. Users can add or remove members of the Curator Group.
It is not advisable to delete the Curator Group, since Users need to be aware of potential changes